

So, have you seen Eunoia’s newest pattern? The Synnove Sunshine Dress?
How stunning is this dress? And all those ruffles!! Oh my, just makes my little heart flutter!!
Wait! Maybe it’s a skipped heartbeat? Is that a little bit of trepidation I detect? Over gathering?
I guess I can see that, there is a lot of gathering in this dress and if you’re unsure how to gather for how to keep gathers straight and even, yeah, I can see why it would be a little terrifying. But, maybe I can help!
Hand Gathering
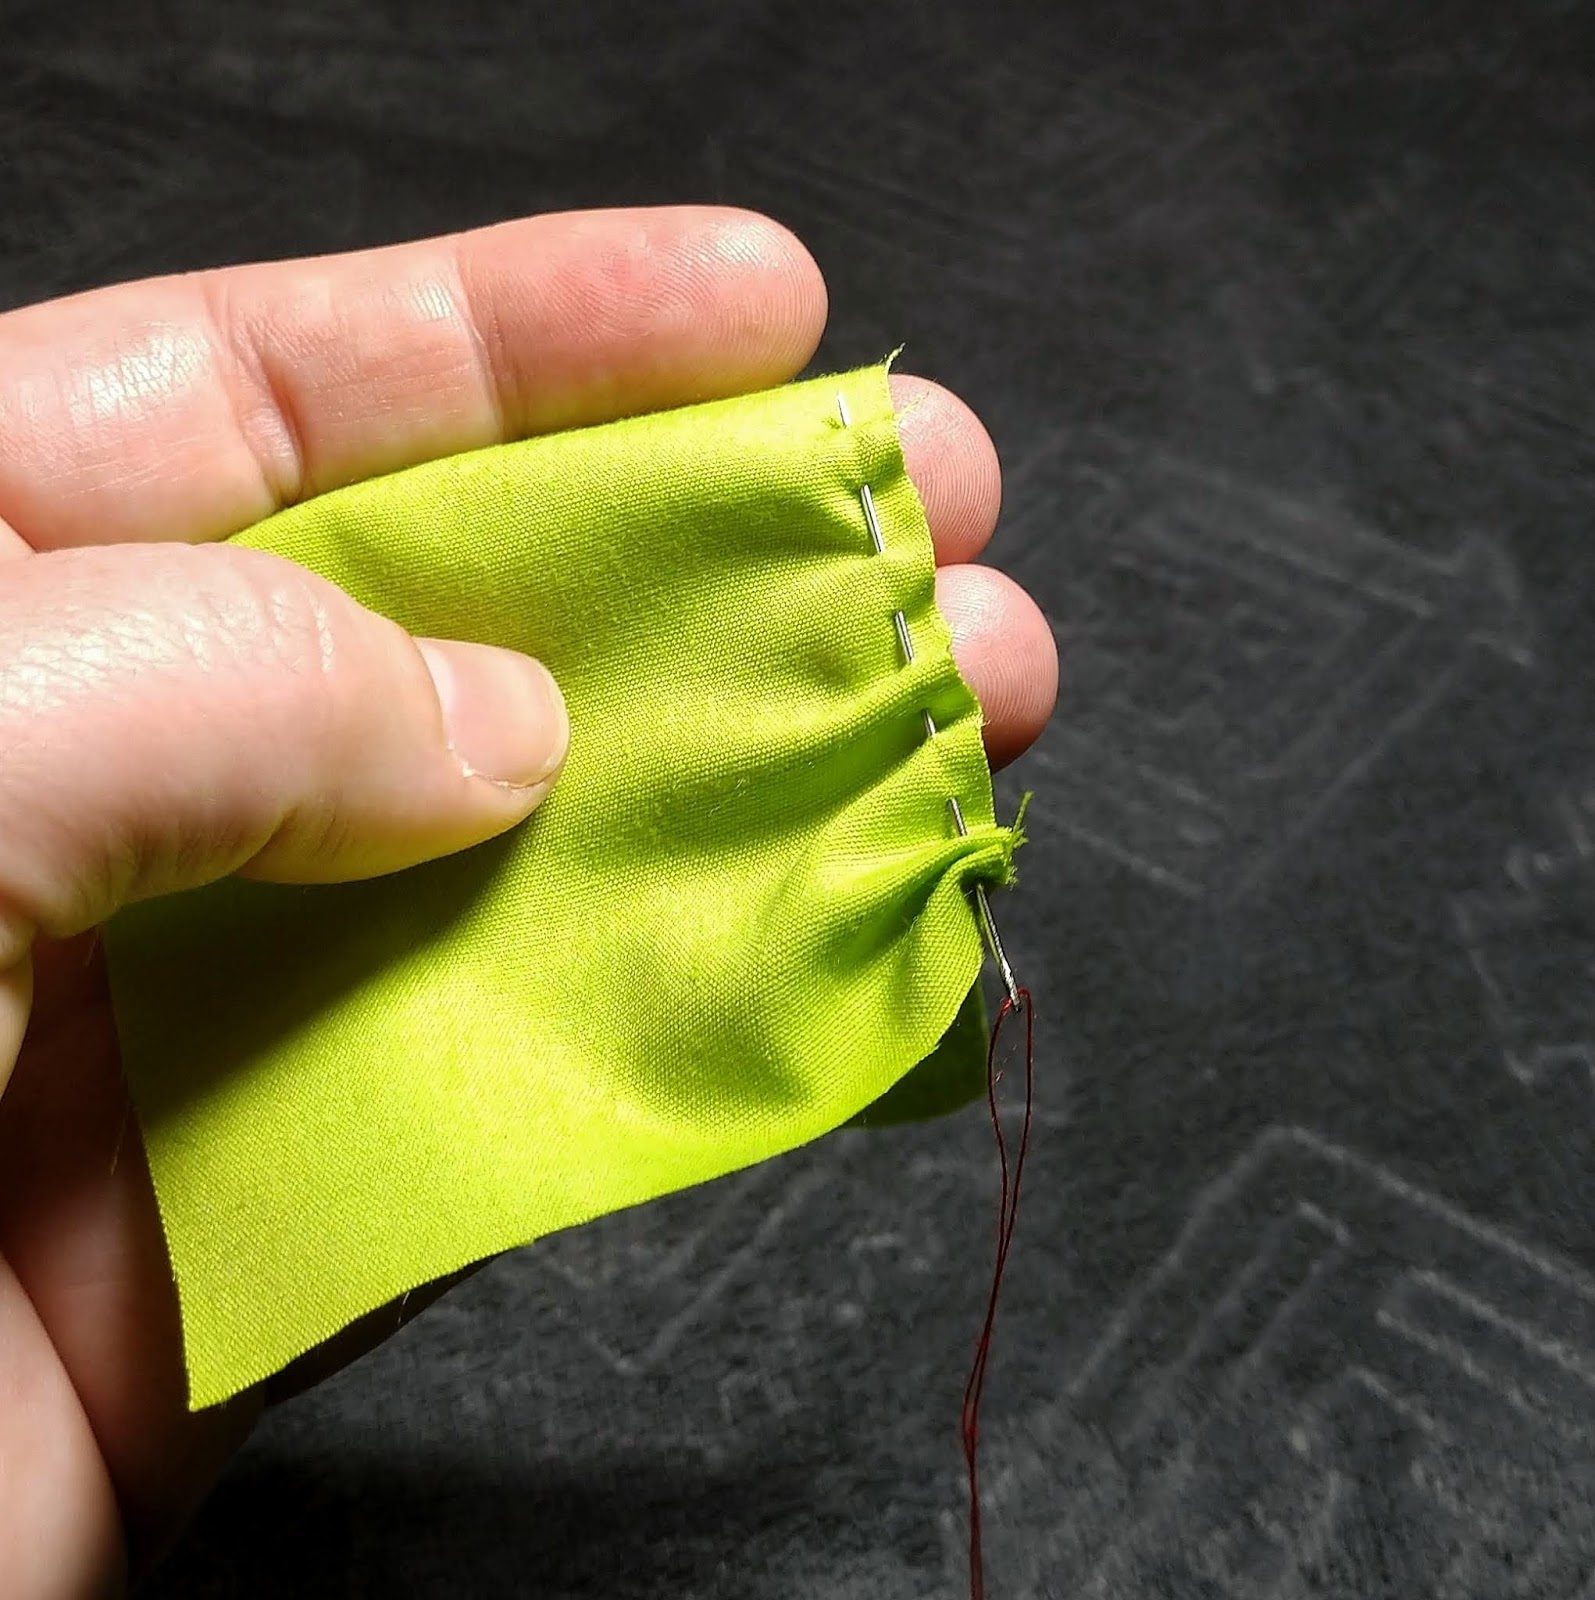
Gathering fabric by hand is really pretty simple. It takes a needle, some thread and lots of time and patience. The best practice for this is to use a needle appropriate to your fabric and thread that will match (mine doesn’t match very well because I wanted it to stand out in the pictures, but I probably could have done better with that, sorry) cut the thread to be at least double the length of the fabric, if the pieces to be gathered is HUGE, you can safely make this thread triple the length of the finished ruffle and there will be plenty.
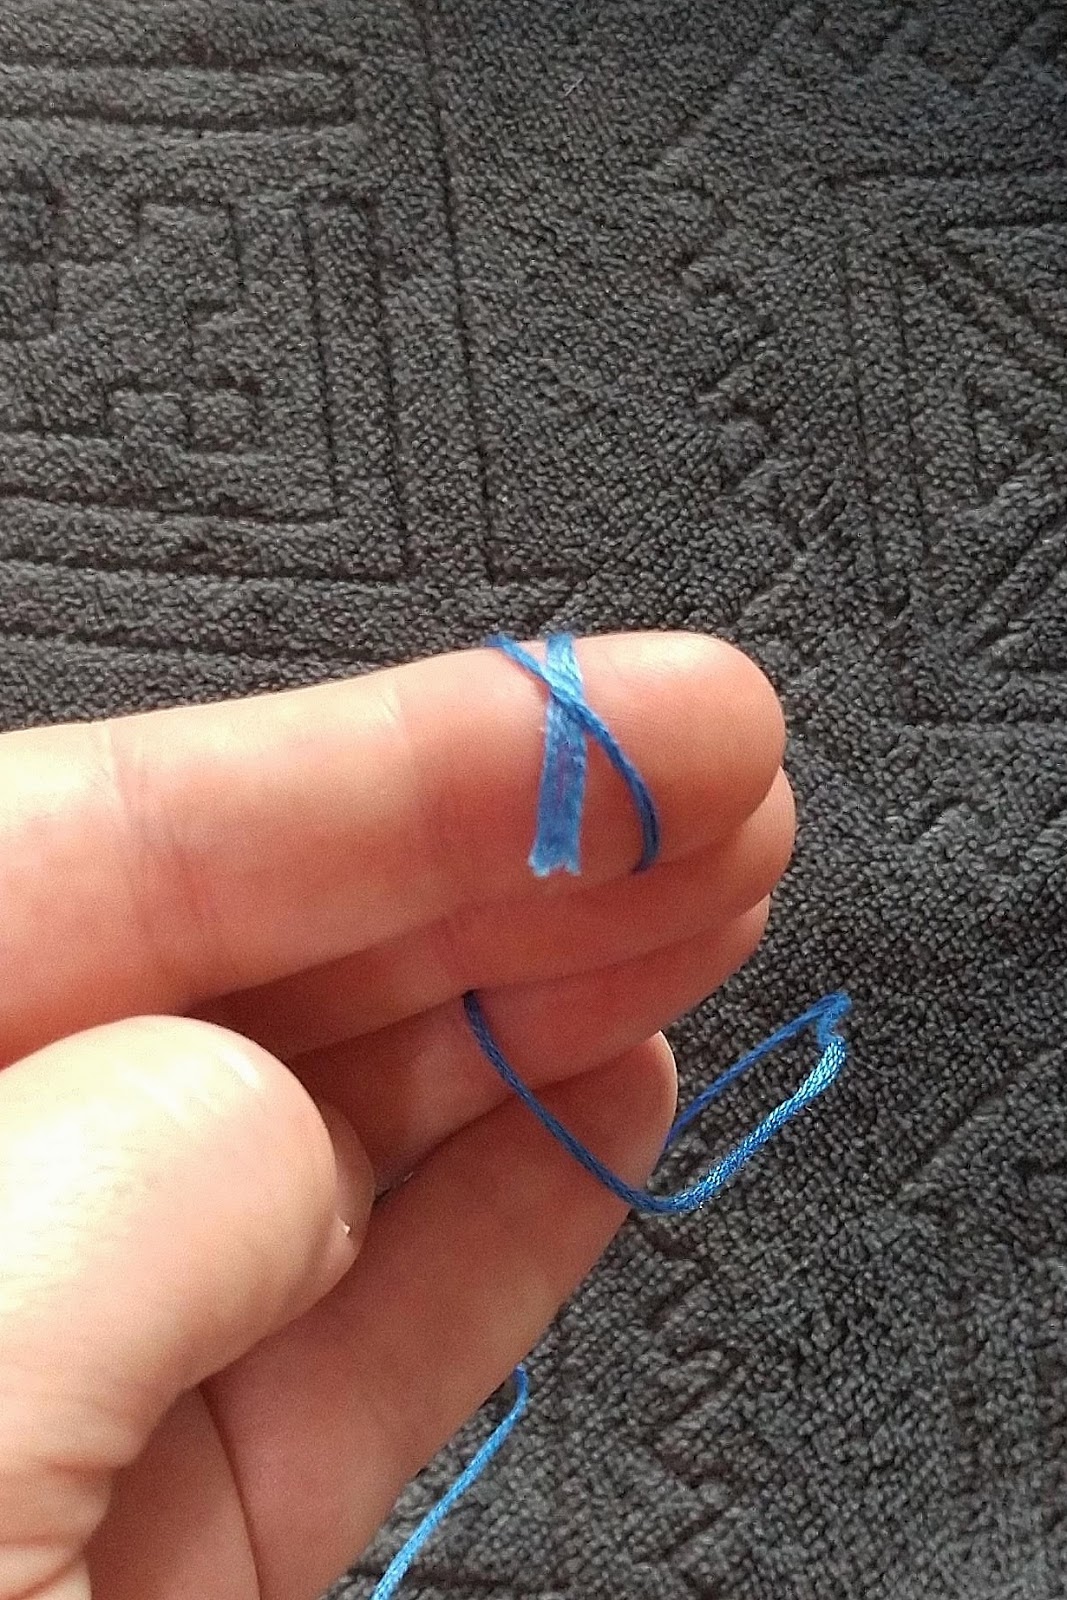
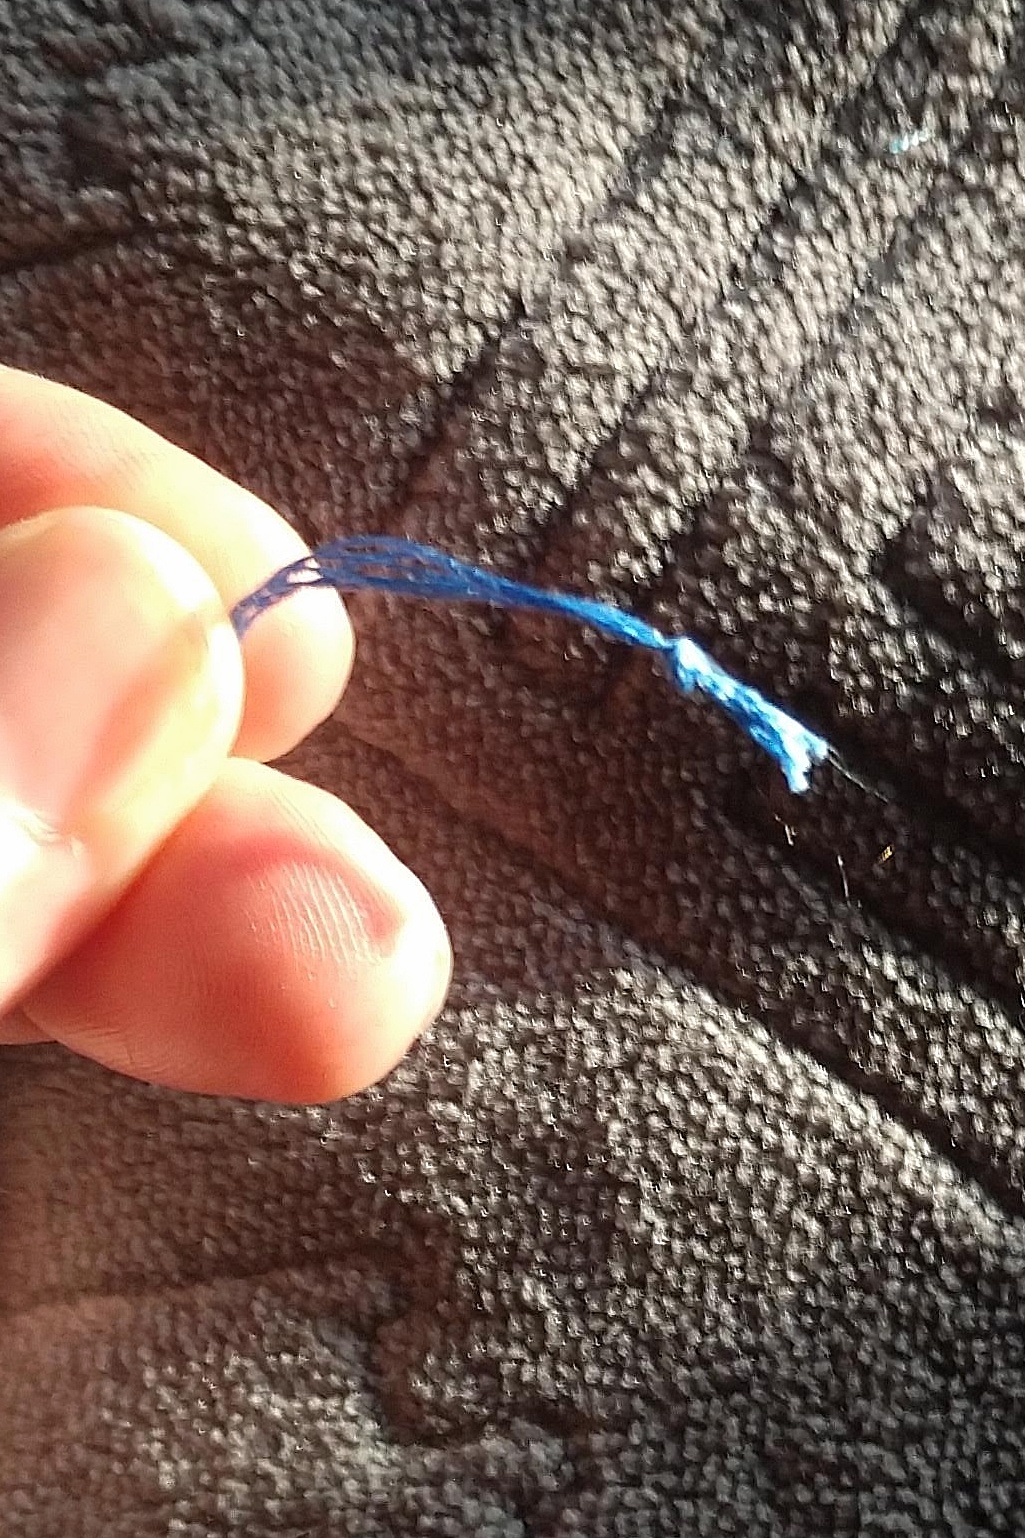
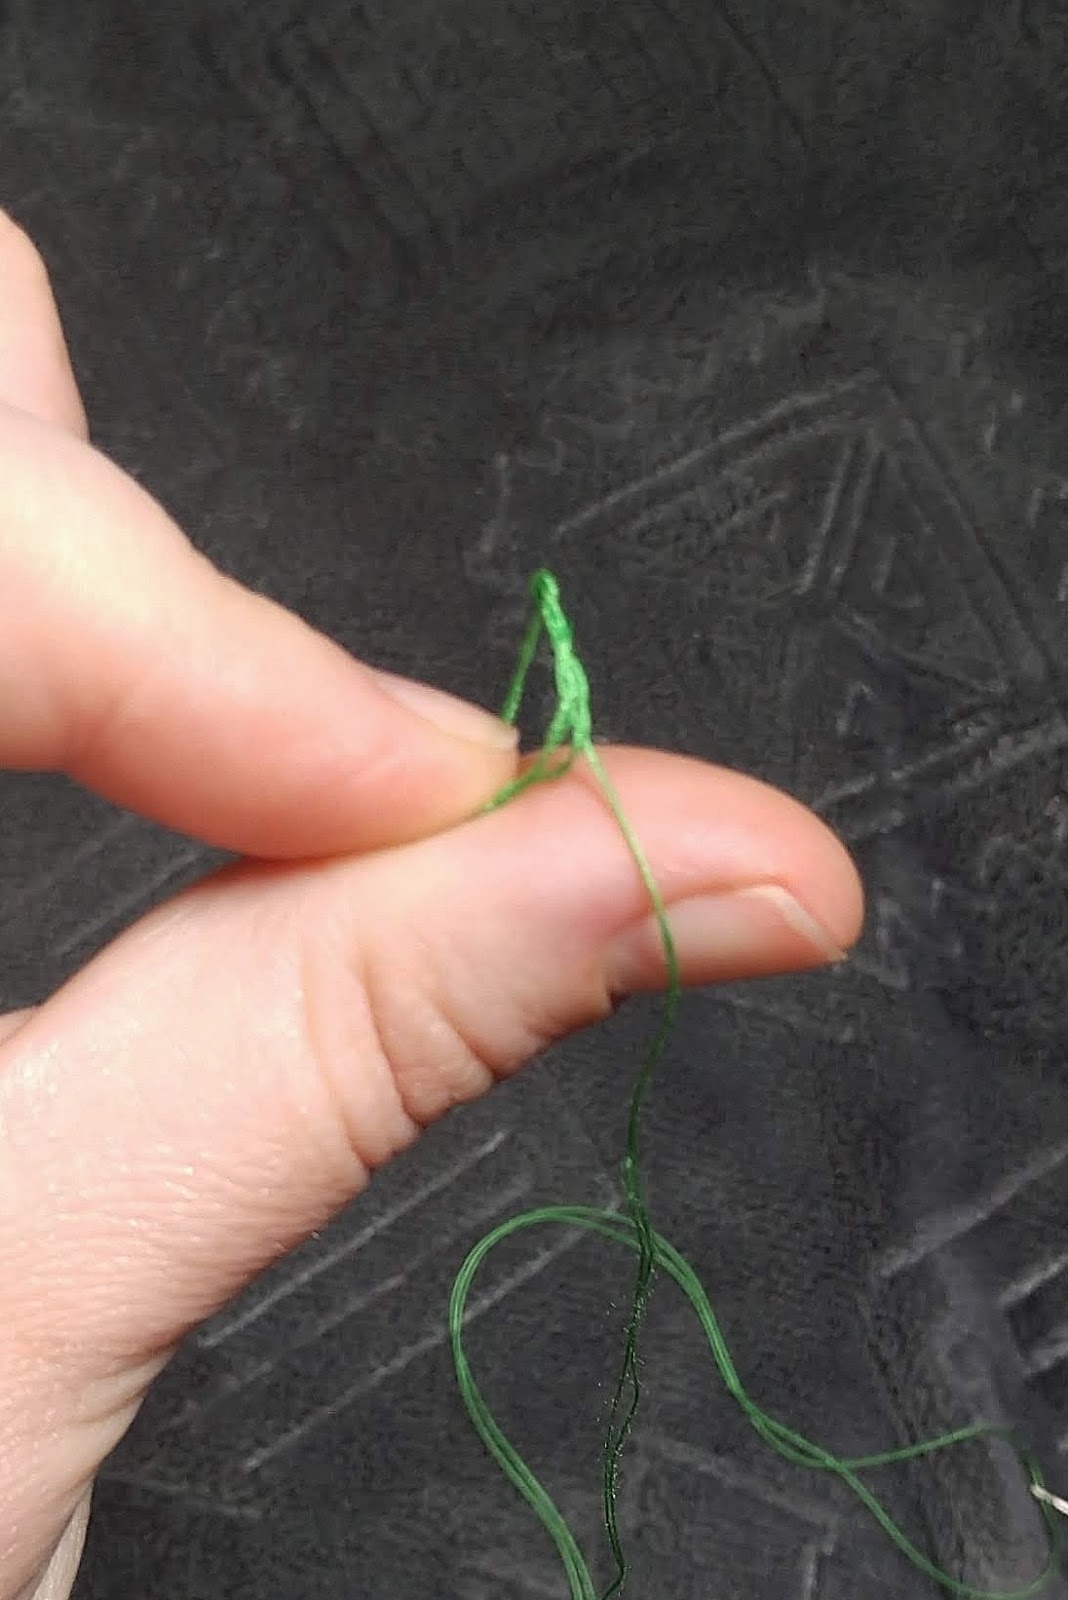
Double the thread and knot the ends together. I have a little trick for trying this knot. I’m sure I’m not the only one that does this, but maybe it will come in handy. I wet my finger a little, (Yes, I lick my finger! Sorry if that grosses you out!) then I wrap the thread around my finger once with the cut end on the bottom and then roll the thread between my thumb and finger to basically tangle the thread and then I use my fingernails to pull on the tangle and pull the knot tight.
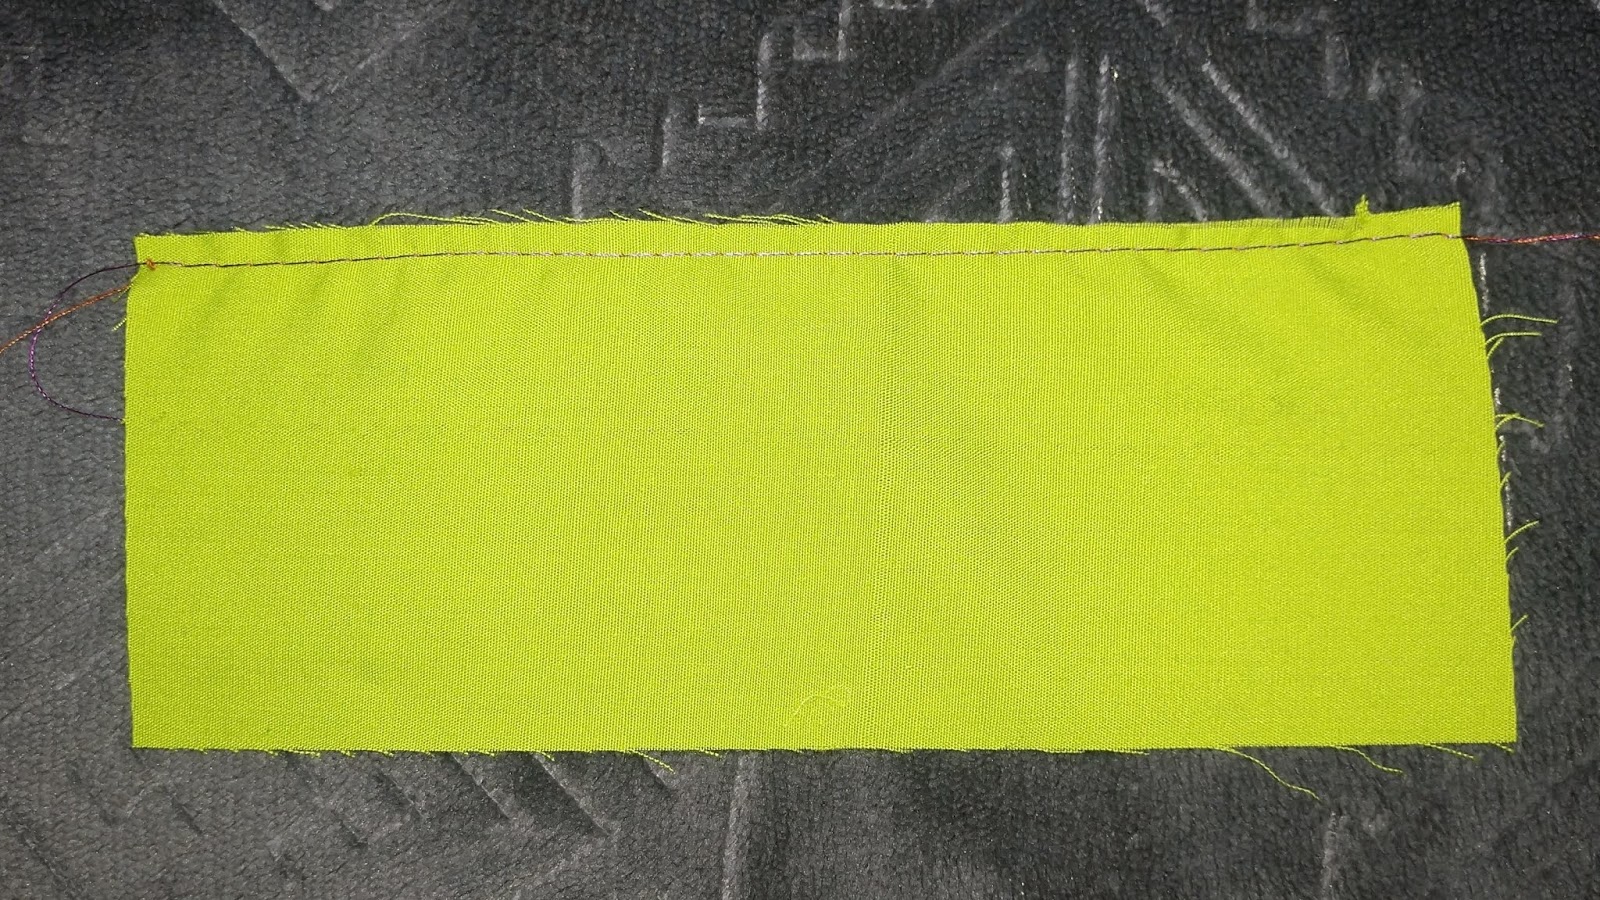
So, we have a needle and thread, now it’s time to stitch! Just a basic running stitch with each stitch approximately ¼ inch apart. A running stitch goes in and moves forward ¼ inch and then comes up and moves forward ¼ inch and then goes back down and moves forward ¼ inch the whole length of the fabric. If the thread is the length of the fabric after gathering, you will need to gather as you sew. But if the thread is the length of the flat fabric you can just do a running stitch all the way to the end and gather when the stitching is complete.
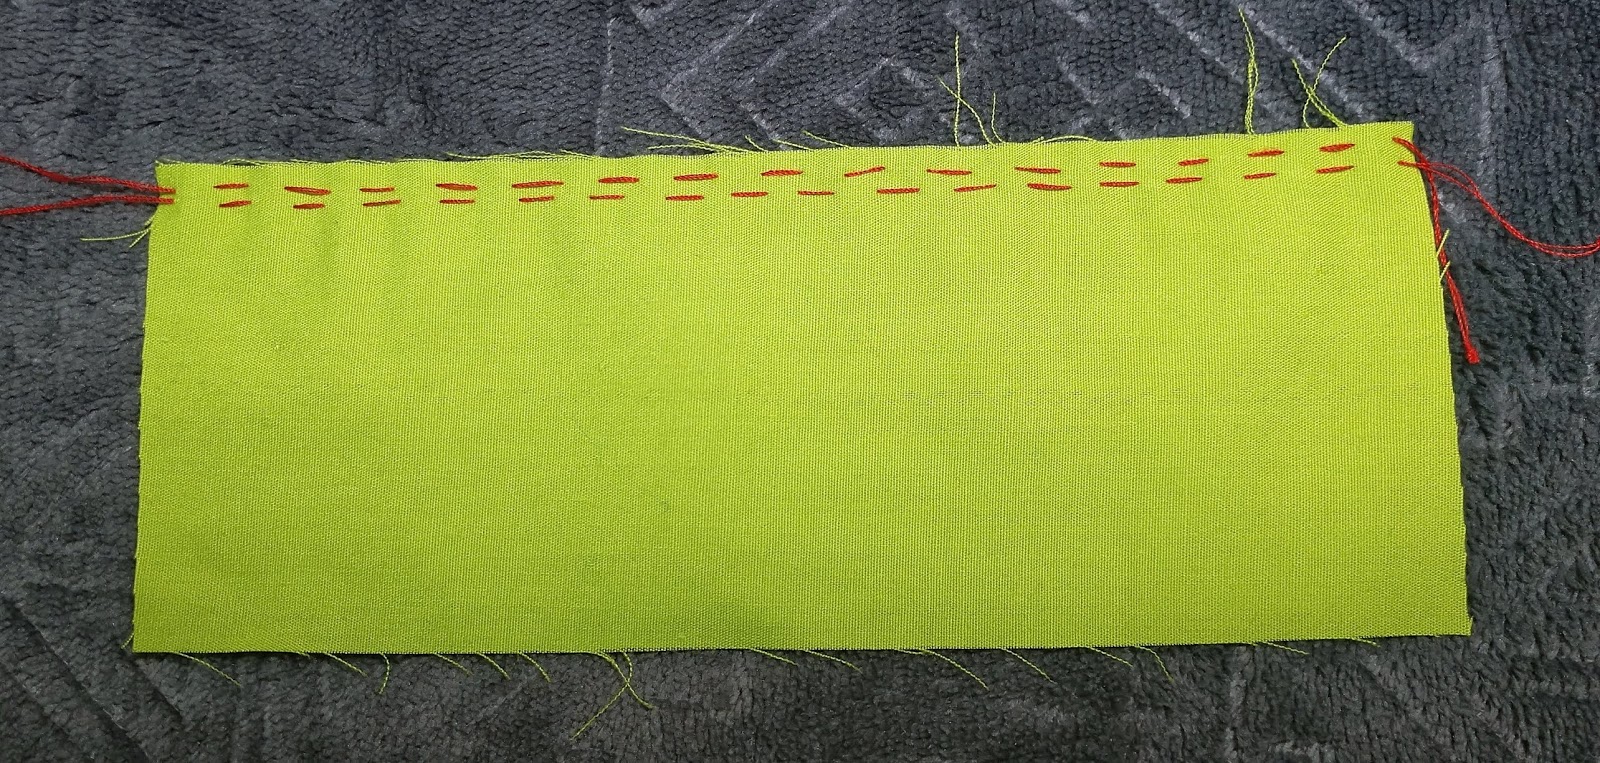
Speaking of stitching! It is generally best to stitch within the seam allowance. This isn’t always possible, especially when more than one line of gathering stitches is needed to get even gathers. So be sure to unpick the stitches that show when you’re done sewing!
Speaking of two lines of stitches!
Sometimes one line of gathering stitches is hard to keep even and laying pretty. This can happen for a number of reasons, including but not limited to, slippery fabric, stiff fabric, thin thread, uneven stitches, sewing machine presser foot pressure and lots of other factors. To prevent some of these troubles and uneven stitches, lots of people like to run a second set of stitches about ⅛ to ¼ of an inch right along the first set of stitches. Some people might even be talented enough to run two needles at the same time! But I’m not, so no pictures, sorry! And then just gather the fabric to the needed dimensions. Seems simple enough!
BUT!
I know, you probably saw that coming! Sorry! I had to! Occasionally, there will be a project or a fabric that is just stubborn enough to require a THIRD line of stitching! I know that it seems like madness, but there are fabrics out there that gathering is just not what it ever wants to do, but those fabrics can be tamed! By a third line of stitching!
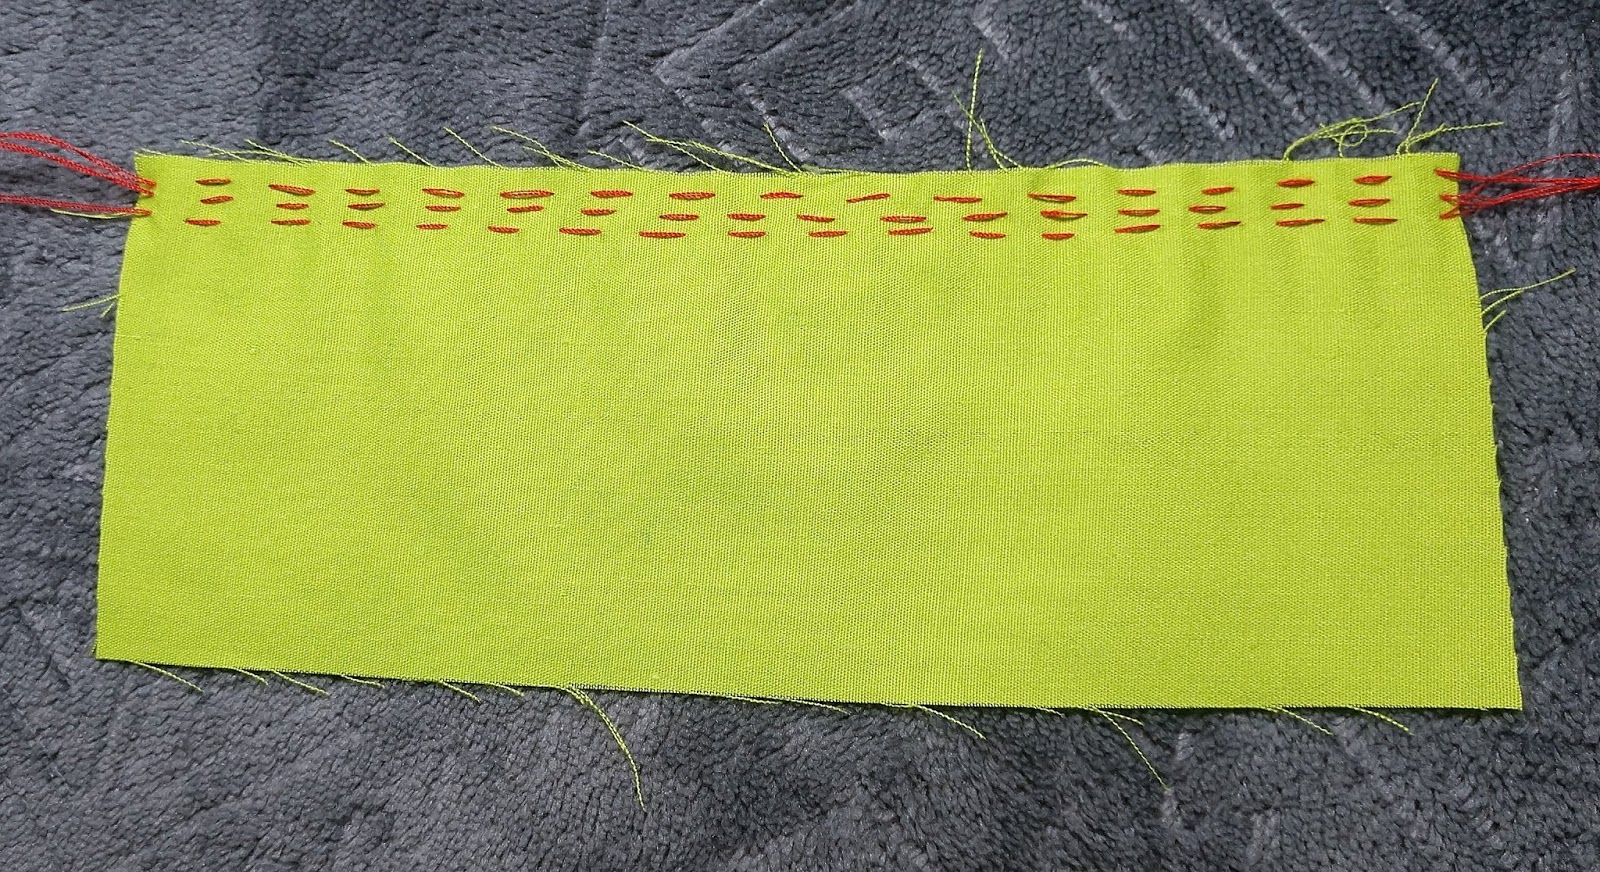
Even at ⅛ of an inch that third line of stitching is probably going to fall outside of seam allowance and will need to be unpicked AFTER the newly made ruffle is stitched into place. The bonus to using 3 rows of stitching is that if a thread happens to snap while gathering there are 2 back up threads! Also, because the third row will most likely fall outside of the seam allowance it has a better chance of keeping the gathers looking nice and even and not flattening to the side during construction.
Now, I don’t know about you, but hand stitching is not my favorite thing. And sometimes there is so much fabric that needs to be gathered that it is really unrealistic to sew that much by hand and gather that much. Talk about hand cramps! This will become a problem with the last tier of the Synnove Sunshine. So let’s pull out our handy dandy sewing machine!
Machine Stitching
Yay! Machine stitching! So much easier then hand stitching and a lot less tiring on the fingers!
But!
Yep, there is another one. Let’s figure this out. A sewing machine is a lot quicker than hand stitching, but it’s a lot harder to pull on to ruffle the fabric also. There are a few things that can be done to make this job just a little bit easier.
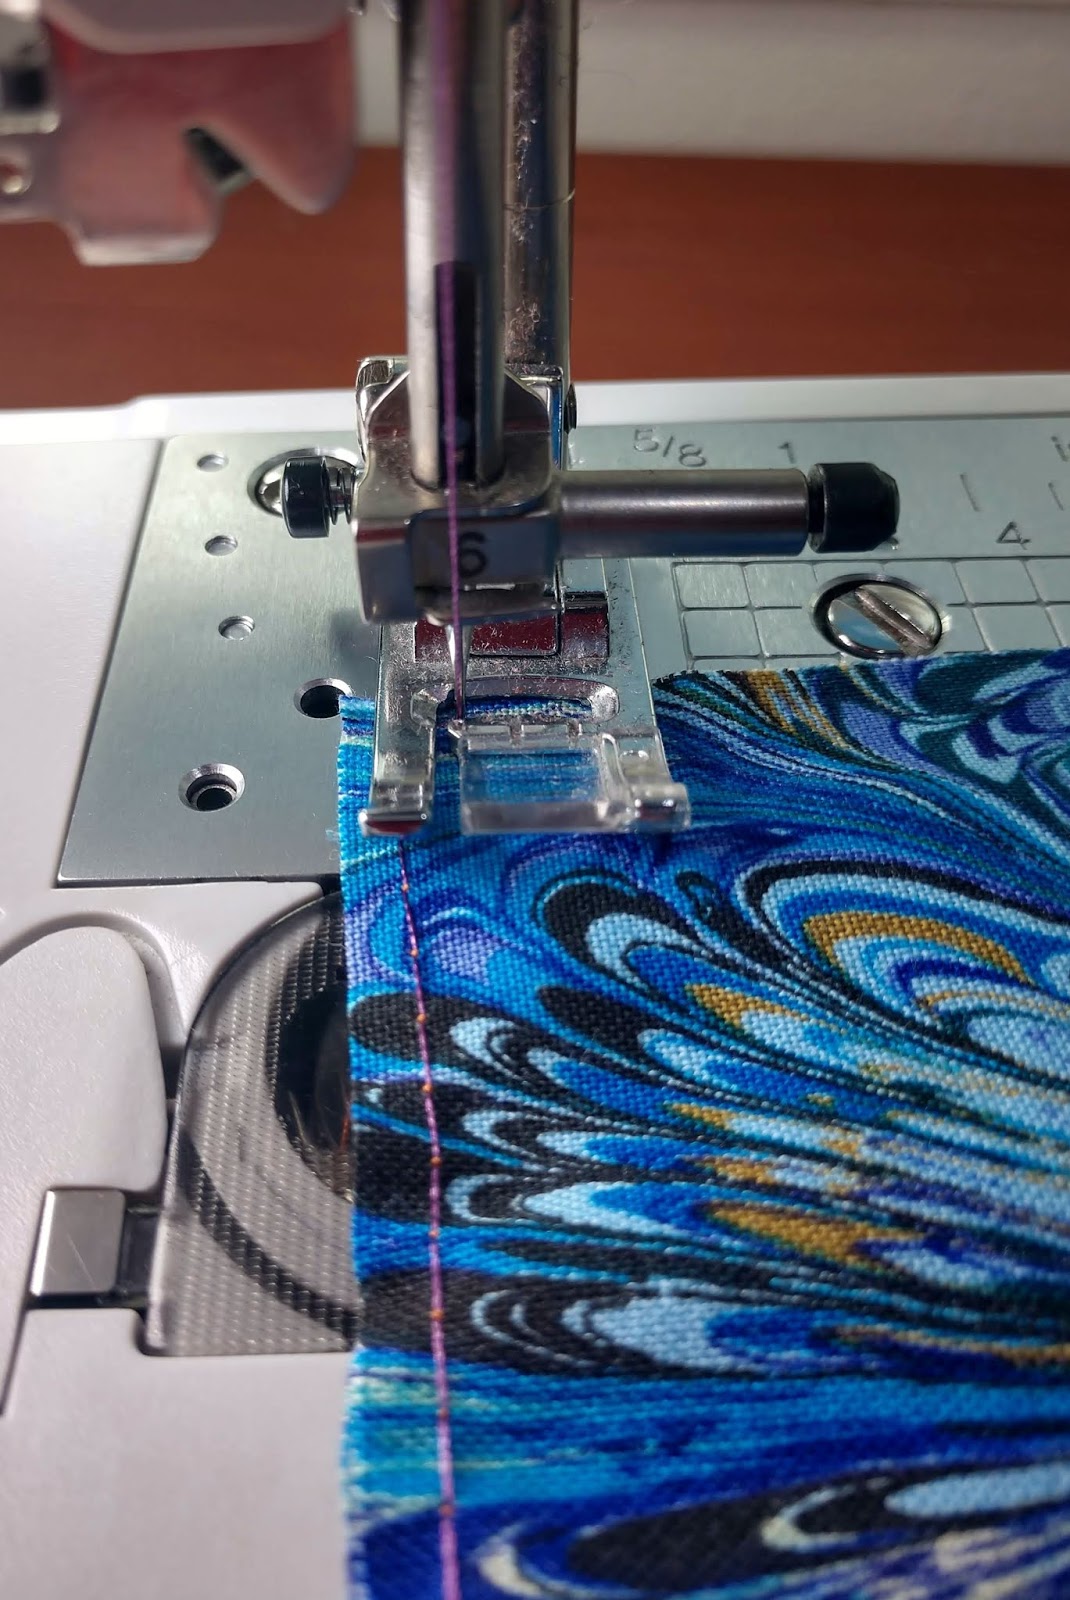
First, take a look at the stitches that come with your machine. I have two different machines to show you, so hopefully you can find the right stitch. What we are looking for is a basting stitch.

A basting stitch is a long, straight stitch used to temporarily keep fabric in place. If you don’t have a button or image that looks like mine, maybe you have one that looks more like this
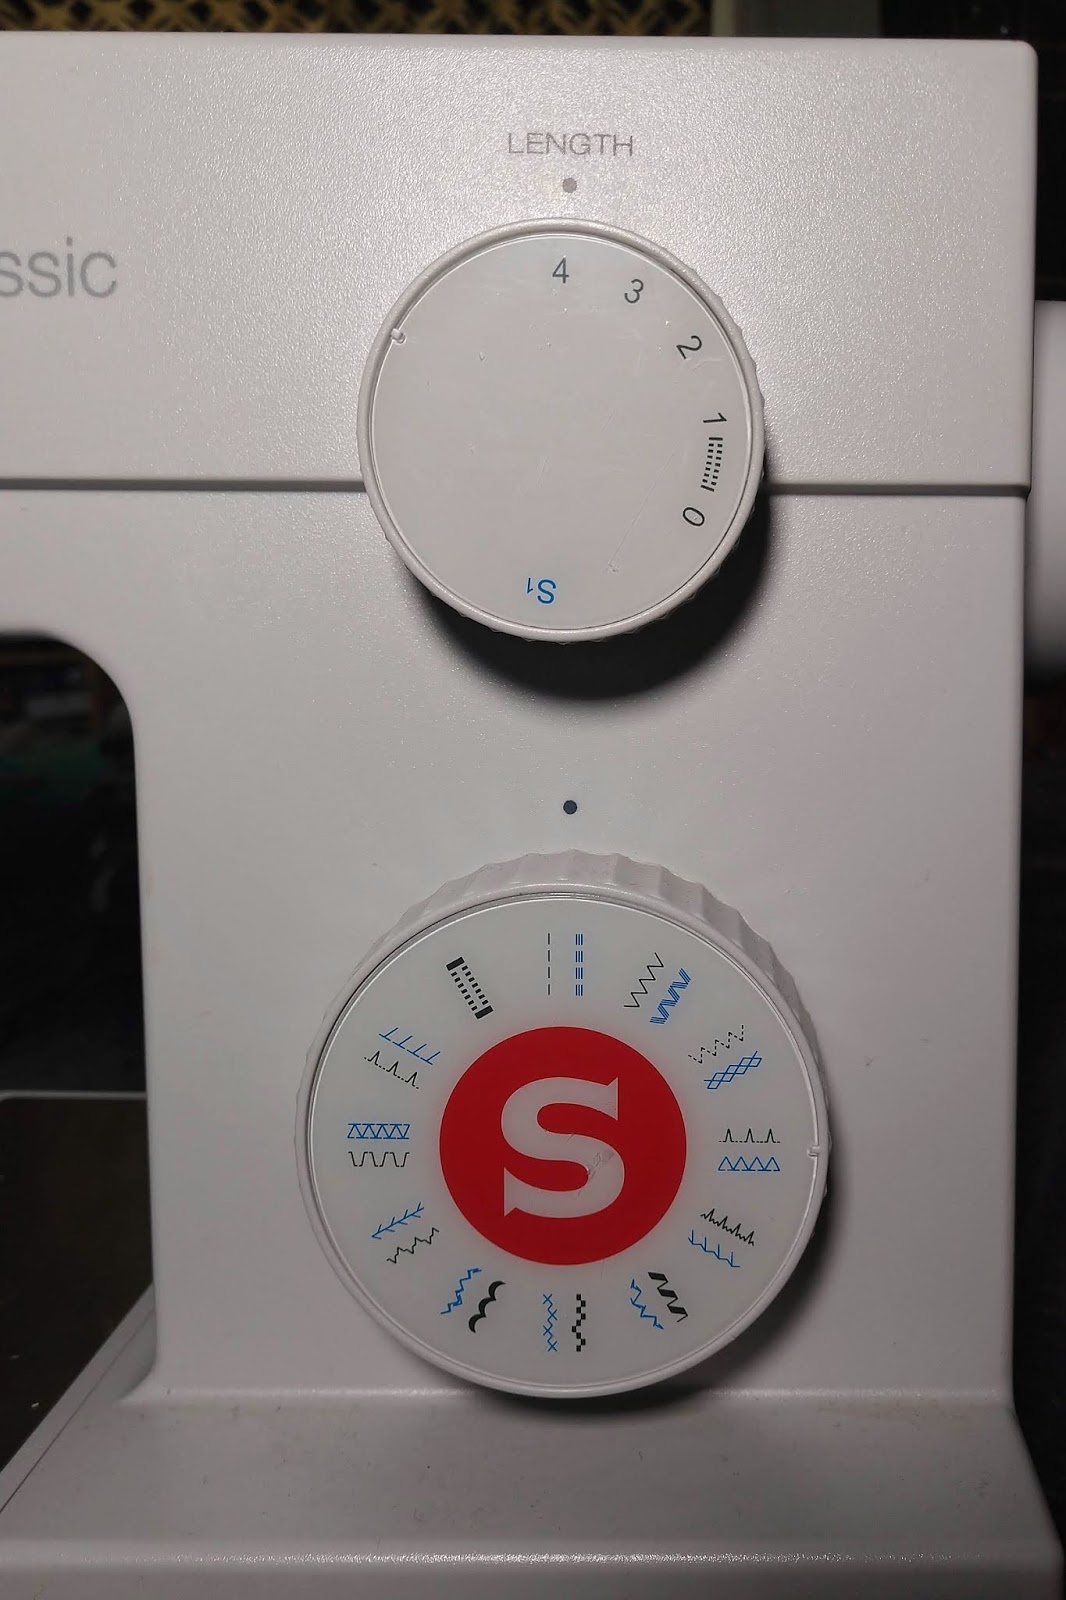
The way this machine works is that the straight stitch is selected and then the length of the stitch is dialed up as far as it will go.
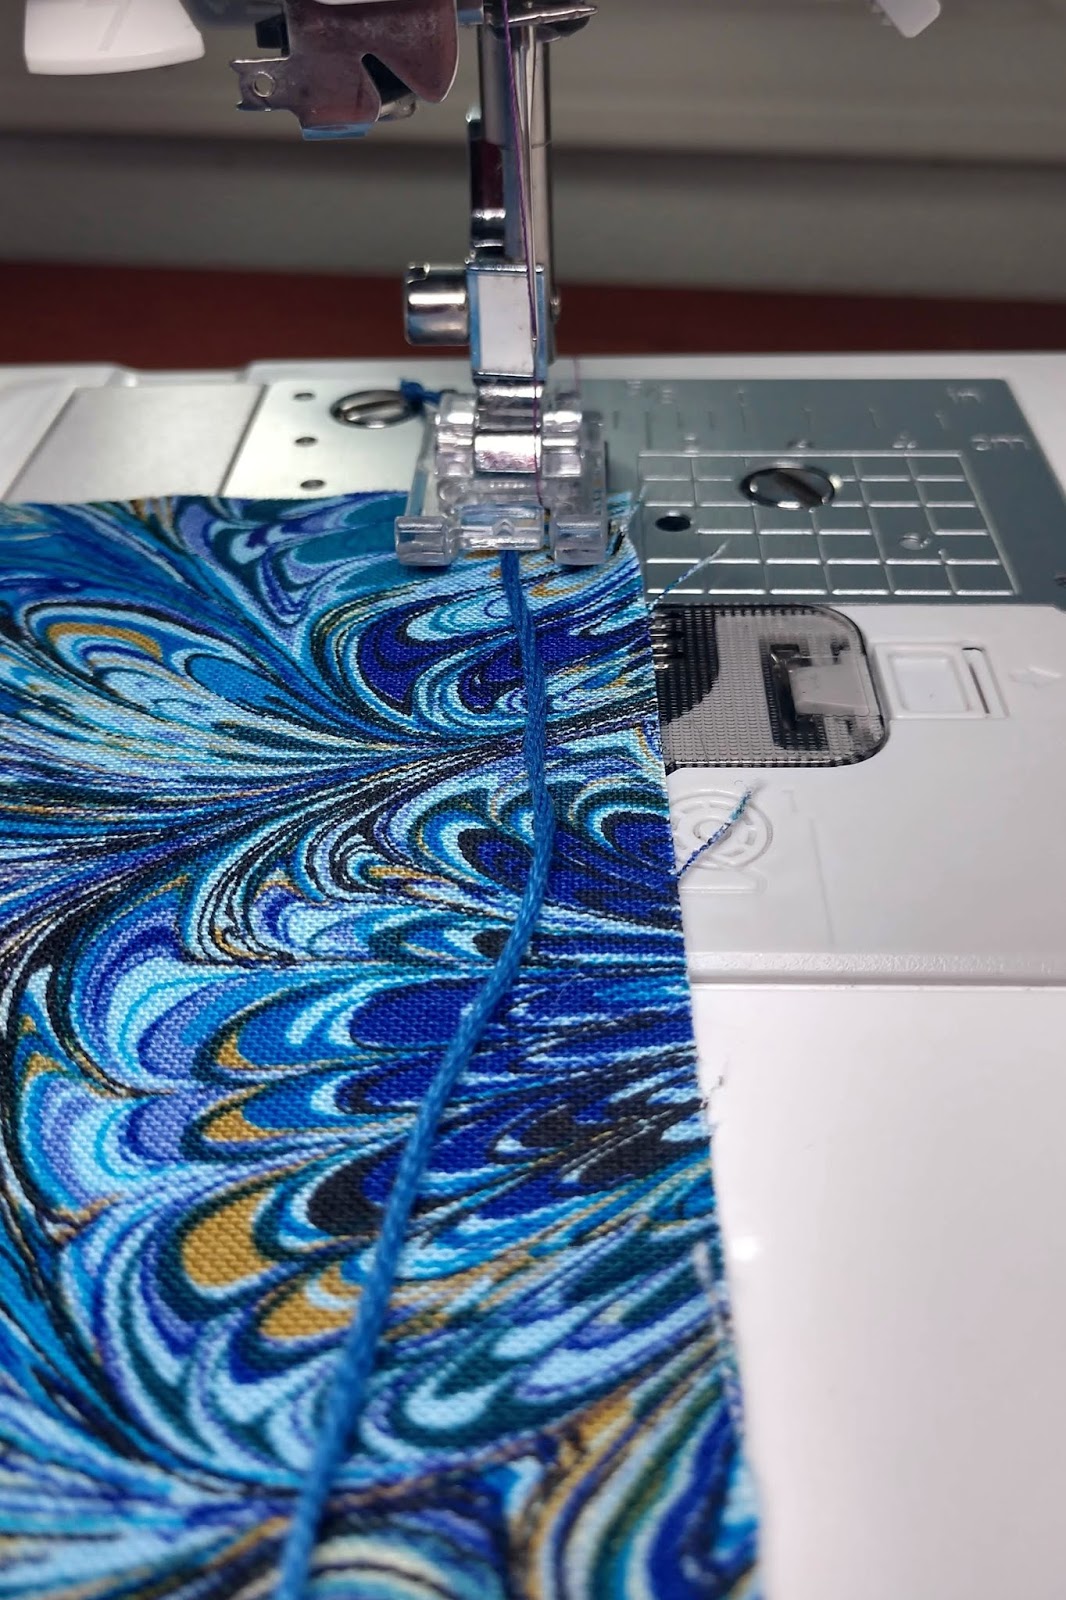
So, select the longest straight stitch and then bring up the bobbin thread and pull both threads out behind the machine by about 4 to 6 inches. These long tails will help in the gathering process. Do not back stitch at the beginning or the end of the fabric. Follow the same techniques as with the hand gathering and stitch straight along the edge of the fabric about ⅛ to ¼ of an inch away from the raw edge. Leaving 4 to 6 inch tails at the end, so both ends will have long tails.
You very much can do just one row of basting stitches. I’ve done it! I think it can look just fine. But really the amount of rows you do is really up to you and the look you want! Keep in mind that if one row of stitches is used and a thread snaps the gathering has to be started all over again.

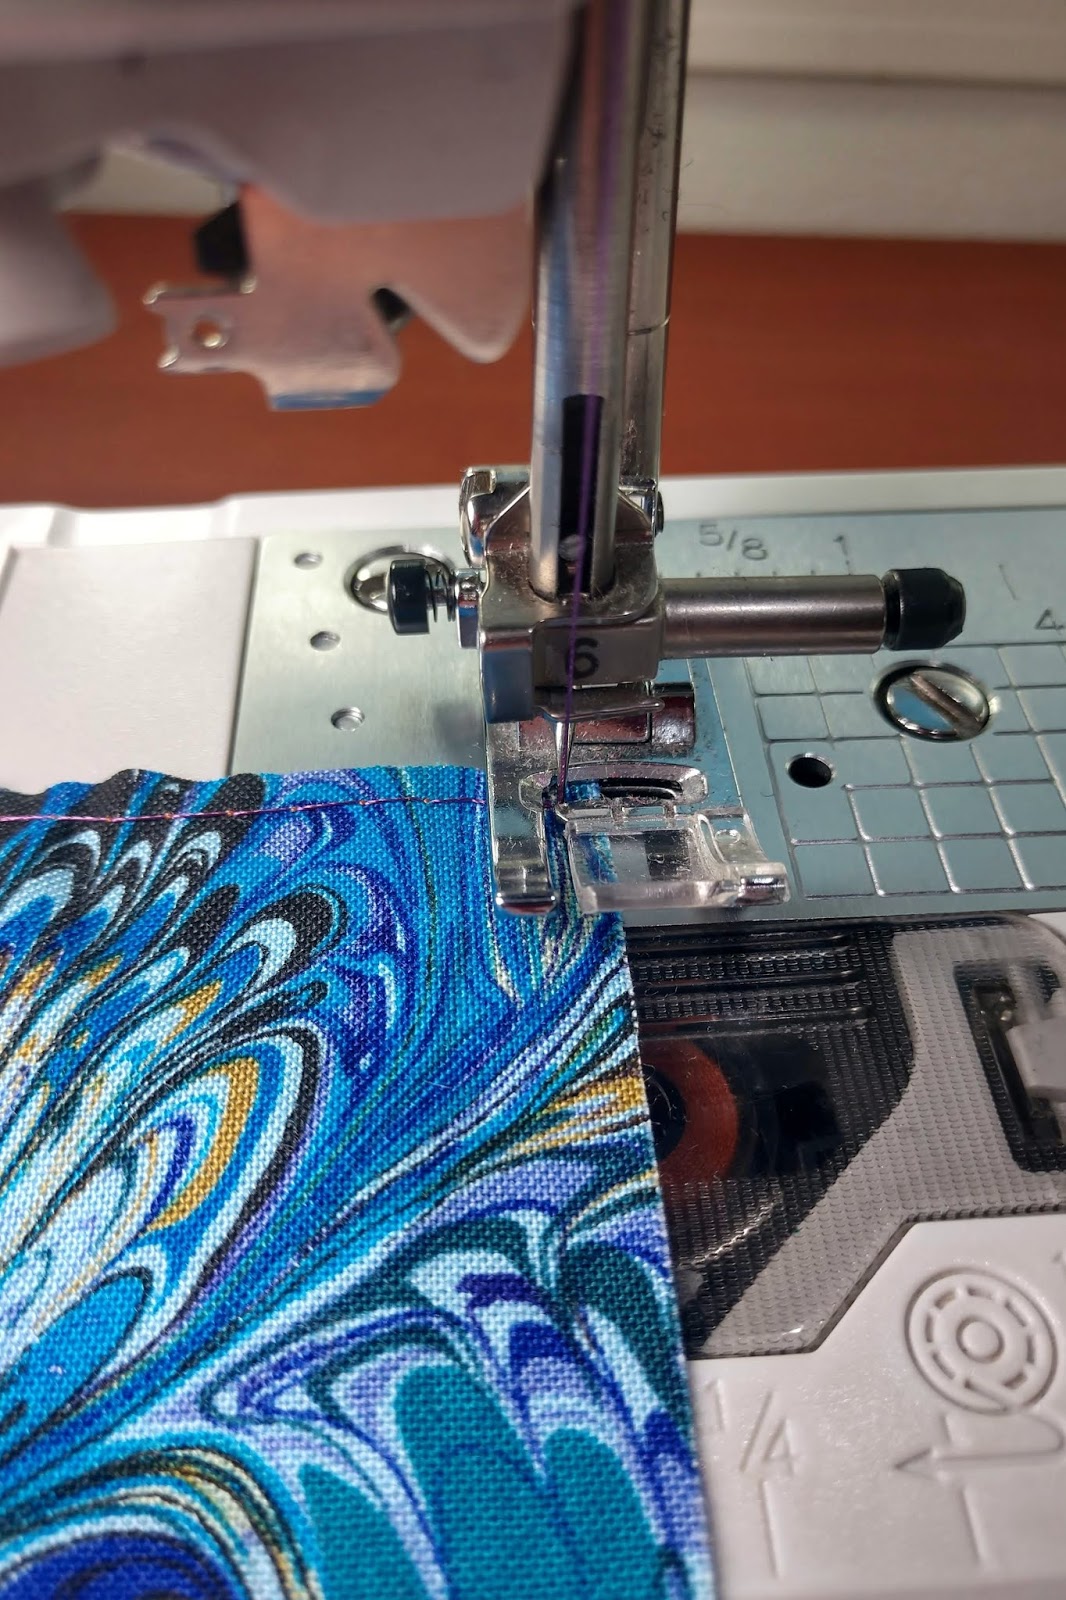
You’ll notice that I’m using a different color thread in my bobbin then I in the top. That’s just to be able to differentiate between them more easily. When the need for the basting stitches is over they can just be unpicked, so it really doesn’t make a difference if they match the fabric or not. Really, it’s probably going to be easier to pick out the bobbin thread from the top thread this way.
Little honest moment: I cannot for the life of me sew a straight line!! Because of that, my baste stitches are almost always at least ¼ of an inch or more apart because I’m afraid I’ll cross my stitches and then I have to take all of them out because the thread can’t pull through to gather. Also, my Brother SE-400 is a little bit of a diva and doesn’t like to have anything but embroidery thread on the top. Embroidery thread is slick and shiny and a whole lot easier to pull through for gathering. So when I say that I break the rules and pull the top thread when gathering, you will know that it’s because embroidery thread spoils me a little.
Quickly, I want to show you another way to have 2 rows of stitching work for gathering. Start by getting the tails ready and make a long straight row down the edge of the fabric go almost to the very end, but not off the fabric. Stop with the needle down and raise the presser foot. Turn the fabric 90 degrees and drop the presser foot back down. Now make one single stitch. Leaving the needle down again and raise the presser foot. Turn the fabric 90 degrees so the stitching will go back the way it came. And stitch back along the first row of stitches being very careful not to go too near. Now, this technique isn’t going to work well on long pieces or pieces that need to be gathered a lot, or on pieces that are hard to gather because if a thread snaps the whole process has to be unpicked and started from scratch.

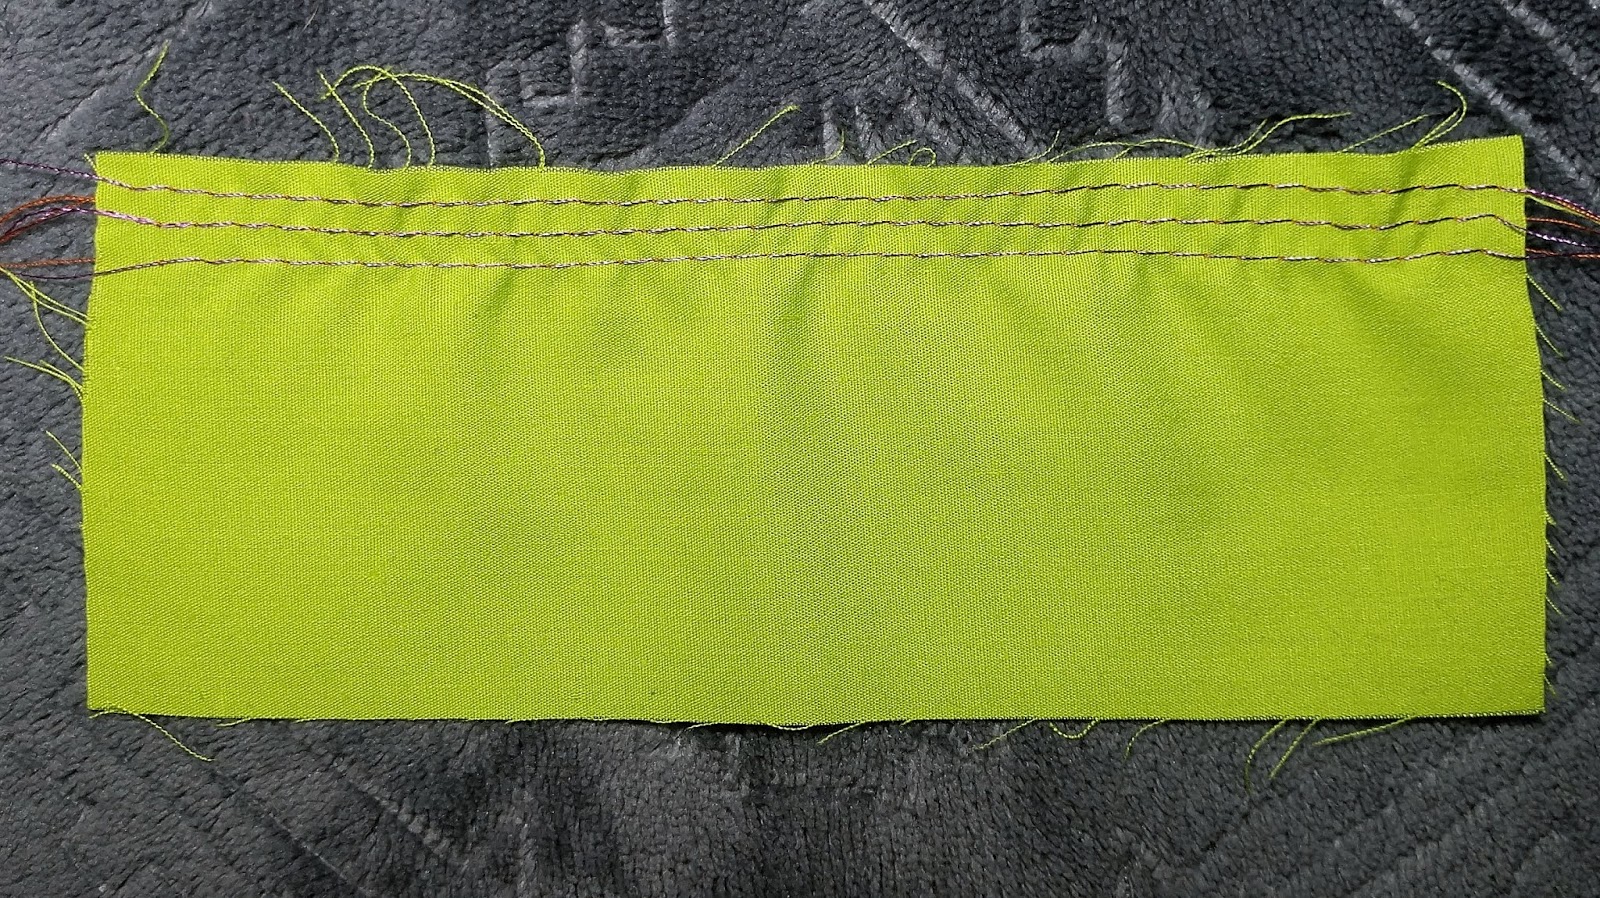
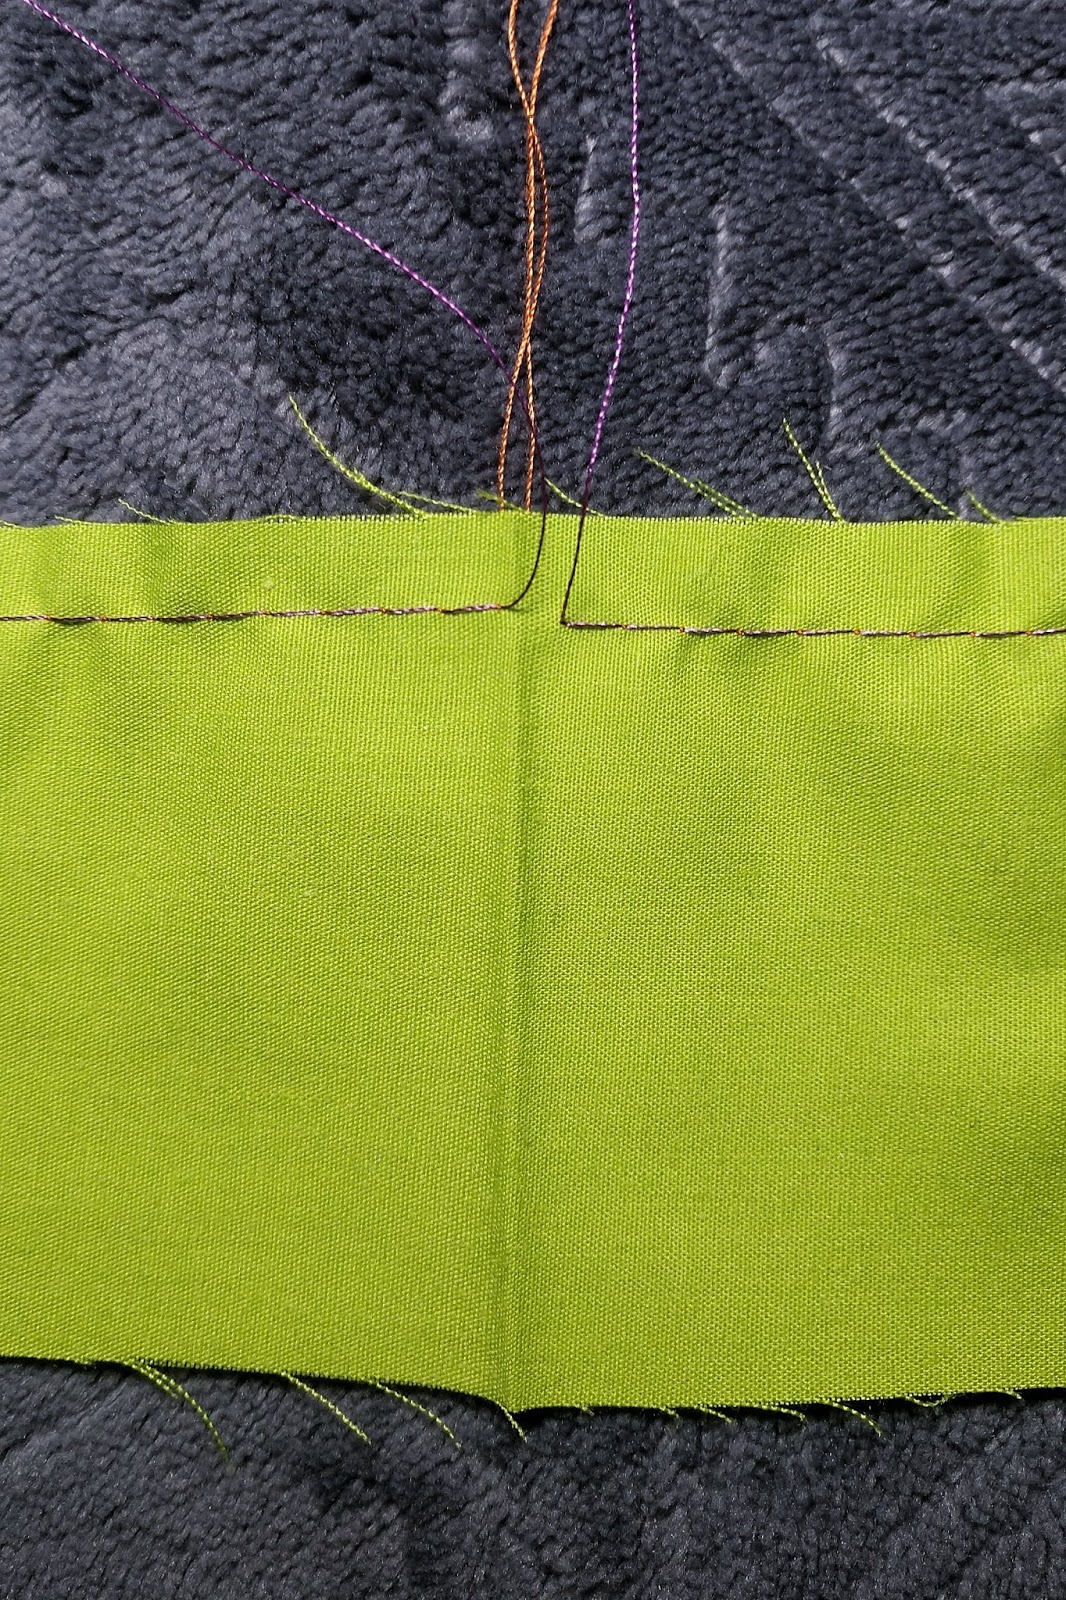
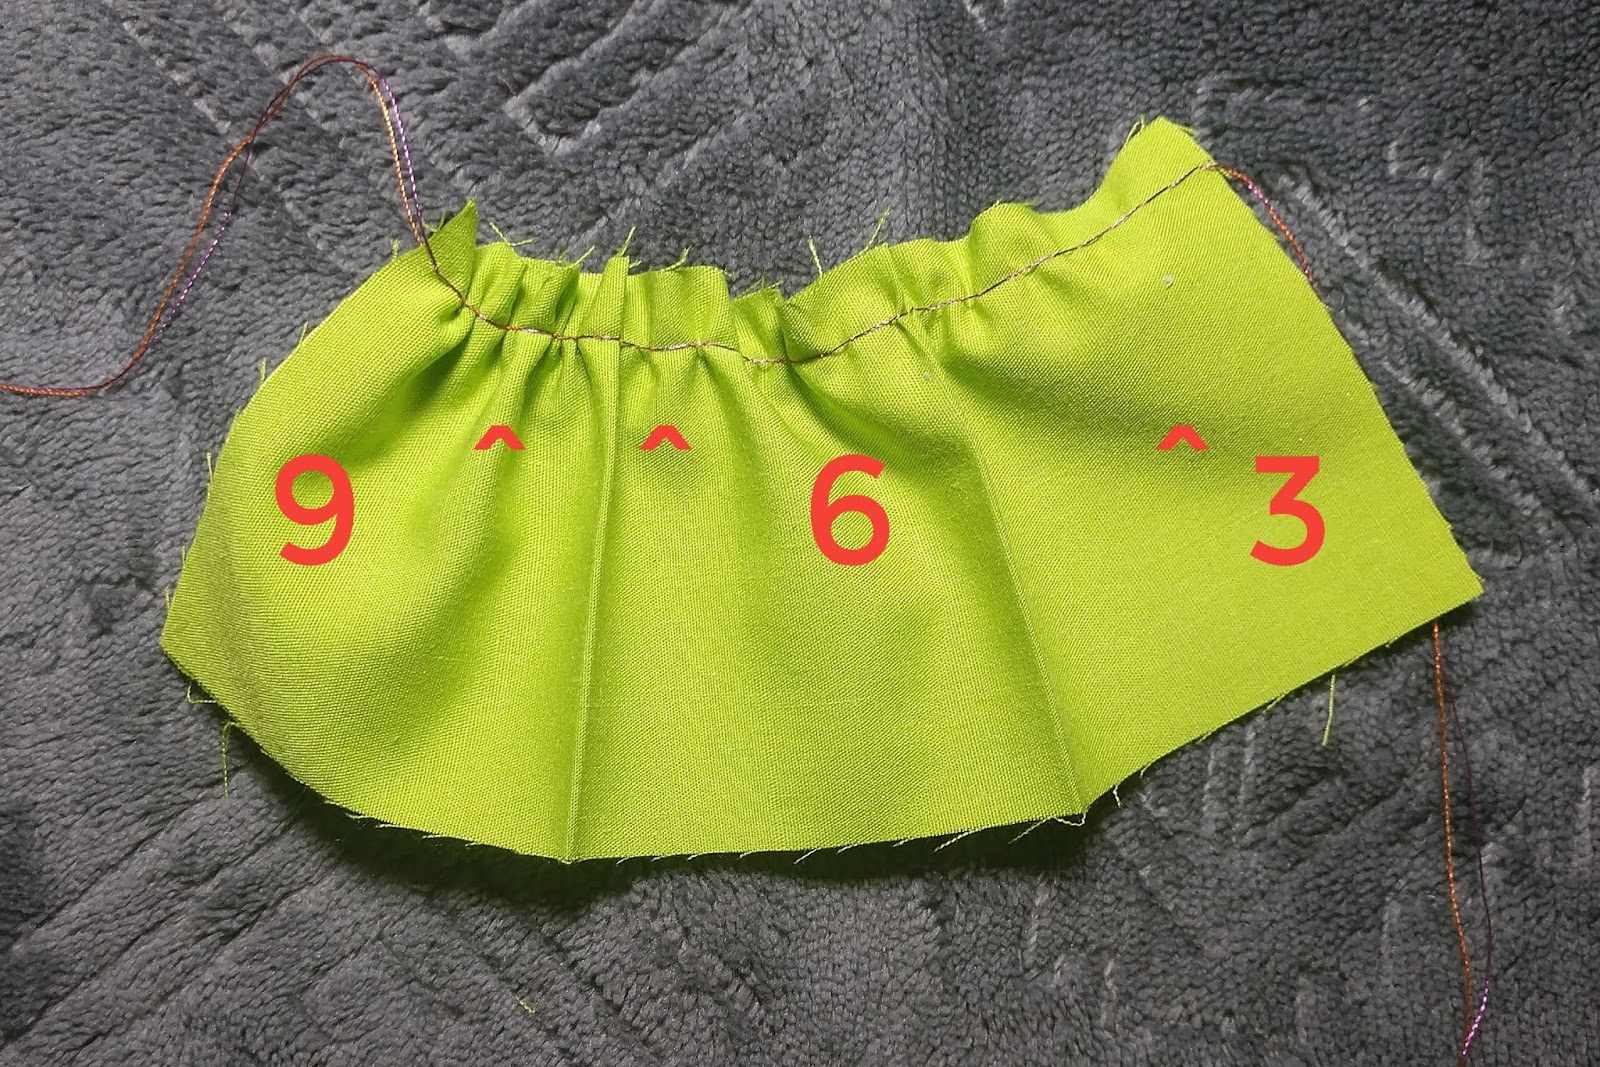
And now we have the three row method. This shouldn’t be too hard to understand by now as the concept it similar to all the others. Long tails at the start and the end, no back stitching, and stitch ⅛ to ¼ inch apart. But let’s take a look at how you actually gather these stitches!
First thing, determine which thread is going to be the easiest to pull on buy giving the middle string a light pull on both the top and the bobbin threads. The bobbin thread is the most common one to pull. But as I mentioned earlier, because I use embroidery thread as my top thread, it is always easier to pull the top thread for me. But you will want to use the one that is easiest for you. When the easy thread has been determined (I am going to use the top thread for pulling in all these images), all the threads need to be separated because they have probably tangled up like crazy. Why can’t the threads just stay all nice and neat? Silly threads! Anyway, untangle the thread and take a hold of all the bobbin threads and tie them into a knot together and cut off the excess. NOTE: This is an optional step. Knots are not required in any way, shape or form to make this work, it just keeps all those tails in once place and out of the way!
Now you are going to gently slide the fabric away from the tails and in towards the rest of the fabric while firmly holding onto the threads. Remember, I’m using the top threads here, but you should be using the treads that are easiest for you pull on. Now, if at any time the threads seem like they are getting caught, STOP! The last thing you want is a snapped thread, so slow down and push the gathers towards the bulk of the fabric at the other end.
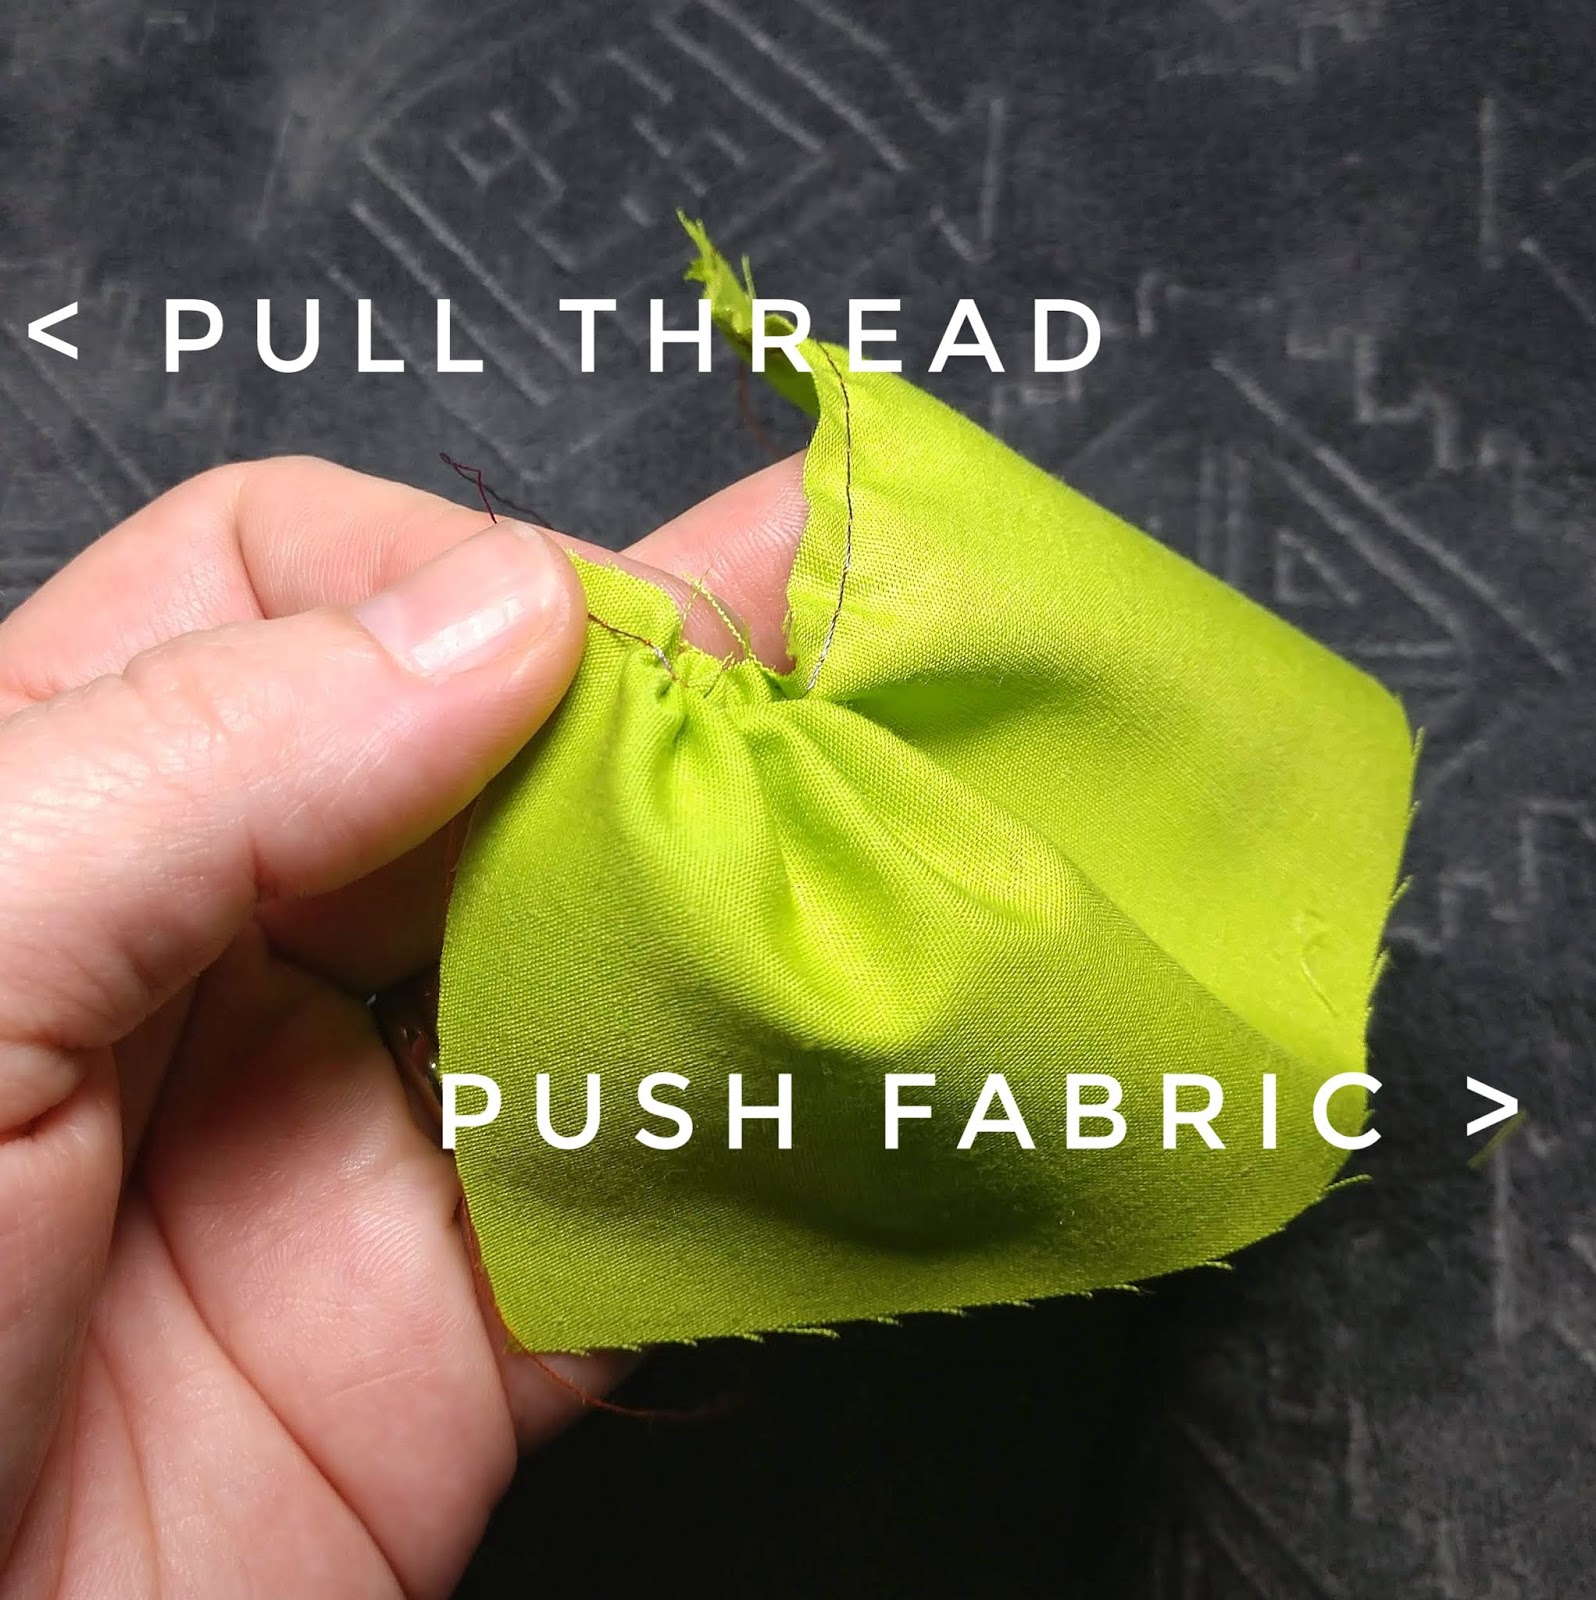
Sometimes you might even need to work the gathers all the way to the end of the fabric before the thread pulls easy again, but try not to pull the thread out of the fabric at that far end.
With really long pieces to gather you may want to stop at a point and switch over to the other side and gather more from the other tails.
For really long pieces of gathering, you may even want to mark the center of the fabric and sew each line to the center and have two places for each thread to be gathered to.
Speaking of finding the center. Gathers make it really difficult to find the center and quarter marks of a length of gathered fabric, especially when you want the true quarters to not be a little lopsided. Tip: the fabric should be marked with quarter marks before starting to gathering it! This is best done by marking the fabric itself, usually with some kind of marking pen that isn’t going to disappear on it’s own, but slender pins will work in a pinch, just be careful not to let the pin hinder the sliding of the thread through the fabric, and be careful not to stick yourself while gathering!
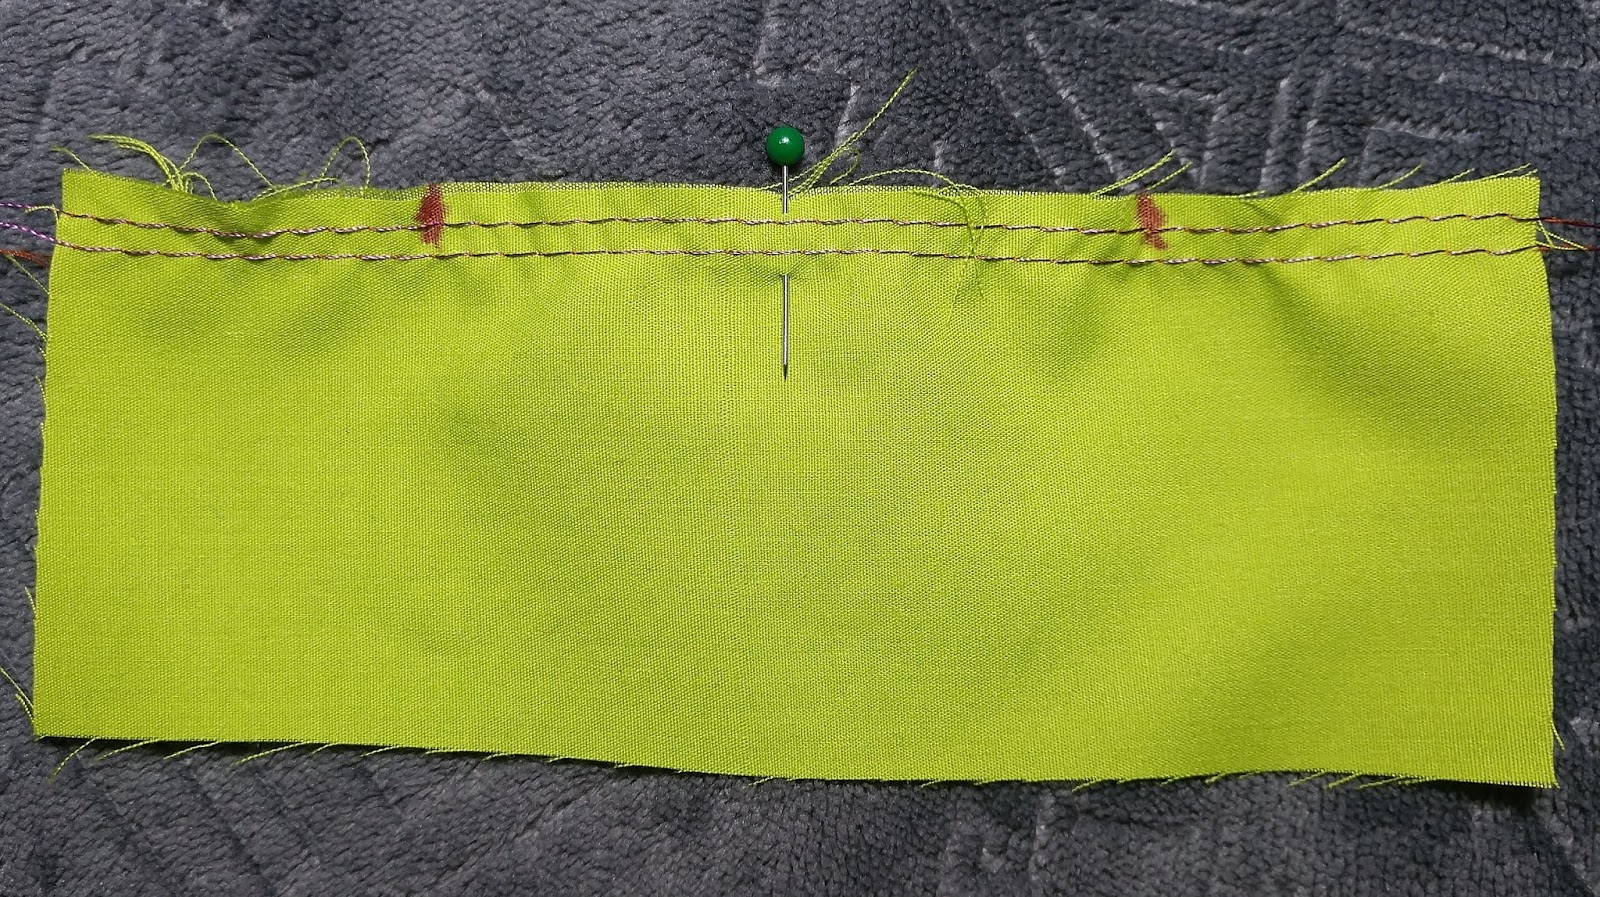
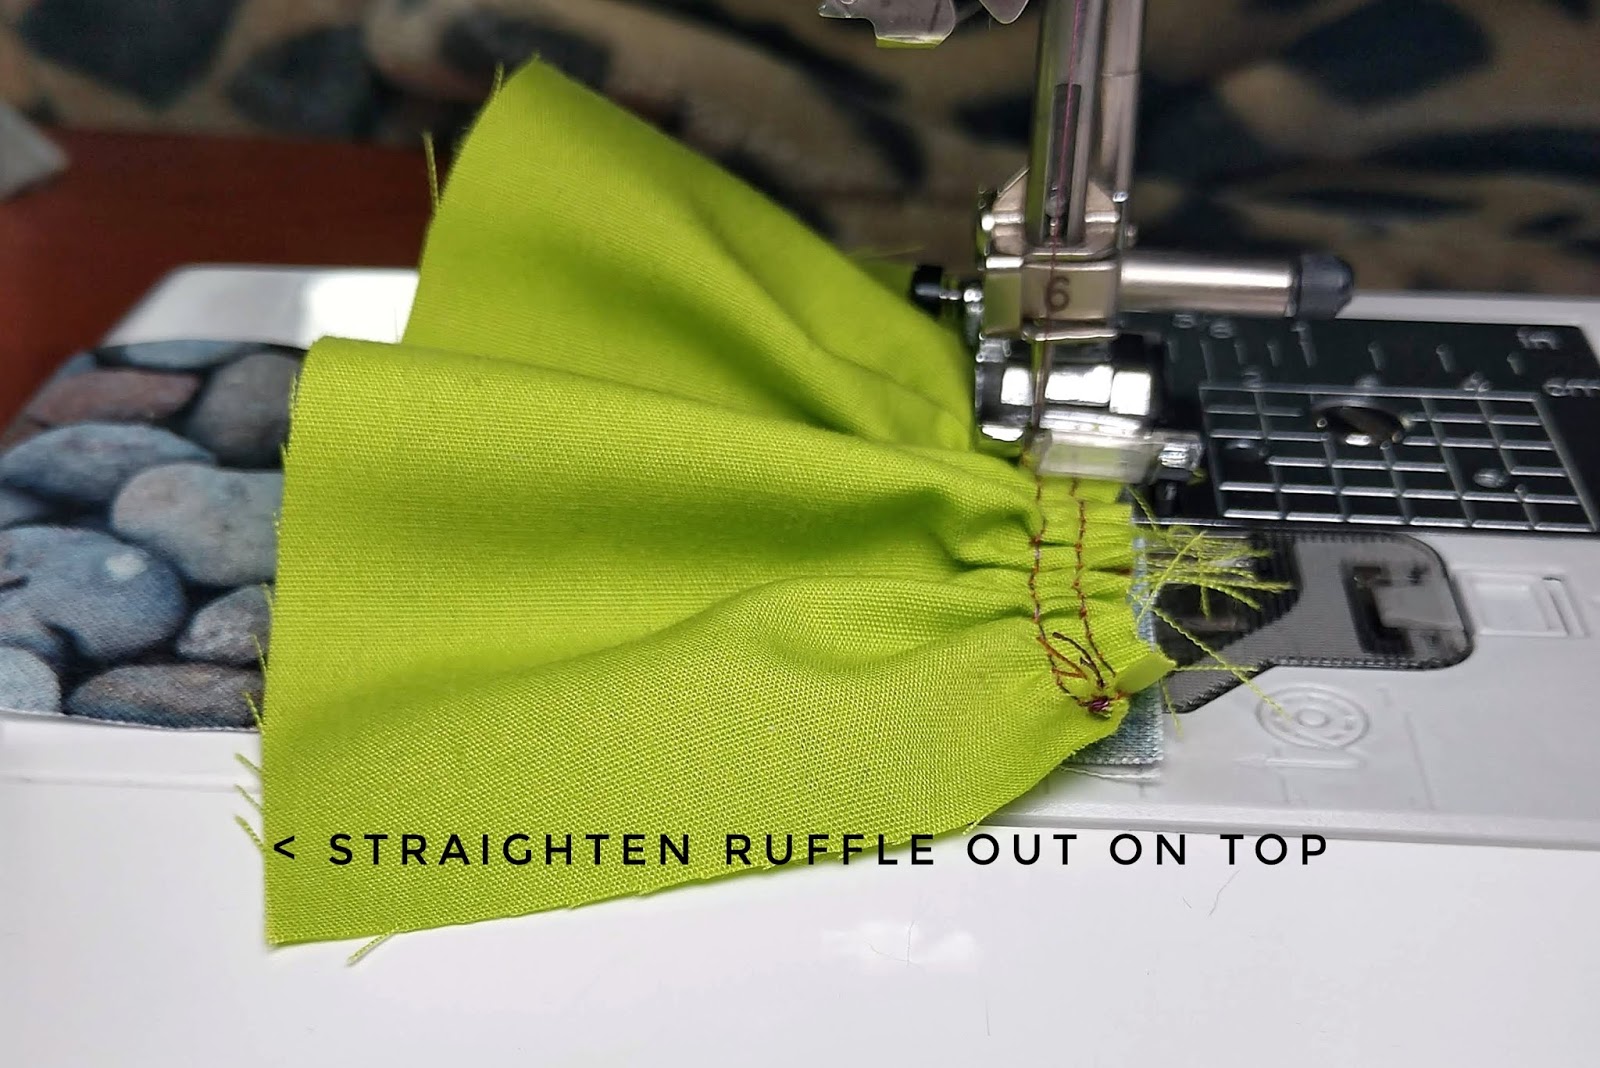
When you get to the end of gathering and the piece is the right size, then I like to tie a knot in all of my threads and trim the excess so they don’t get in the way while I prepare to use the ruffled fabric. Keep in mind that the ruffles can still shifted and moved around while sewing. It is usually best to sew the gathers on top so the behavior of the gathered material can be seen while it is sewn.
Gathered fabric should also be encouraged to come straight from the needle so that the gathers don’t twist and flop as they are sewn. I realize this might be difficult in a small space, but do try, the outcome will be so worth it!
Remember me saying there were lots of ways to gather?
Yeah? Well we aren’t done!
There is this method called “floss” gathering! And it’s actually pretty simple! First thing to do is get a long piece of floss. This can be dental floss, embroidery floss (the kind used to cross stitch), or yarn. Tie a knot in the end of the floss. The same kind used in the hand gather technique will work! Now using a sewing machine with a cording foot attachment to keep a line of cording running down the middle of the foot, or an embroidery foot to allow the floss to pass under the foot easily, or something similar. Honestly, even a regular foot is going to work just fine. The main point of using a different foot is to keep the stitches from going into the yarn or floss.
I used a… Well, I have no idea what the name of my foot is, it doesn’t look quite like the ones I mentioned, but it has a gap under the bottom for the floss to go through. I’ll post a picture so you know what it looks like.

So, here’s how it works, set the sewing machine stitch to do a wide zigzag. As wide as possibly. My machine will go clear up to 7mm wide, that’s a lot! Then set the stitch length to be about mid length, or normal or 2.5mm in my case. Take the knot on the floss and put it under the presser foot, behind the fabric, and hold it, just like the tails are held. Now stitch the wide zigzag all the way down the length of the fabric with the floss down the middle under the zigzag.
When it’s time to gather, just hold onto the knotted end (mine kept pulling through so I clipped it) and pull the floss gently and the fabric will gather like magic! Little tip here, you absolutely can make two rows of zigzag stitches!! It really does seem like the more rows the nicer looking the gathers, so if there is plenty of room in the seam allowance for two rows of zigzag and floss, by all means, use 2 rows, if that’s what you want! There are no gathering police to stop you! You just do you, my friend!
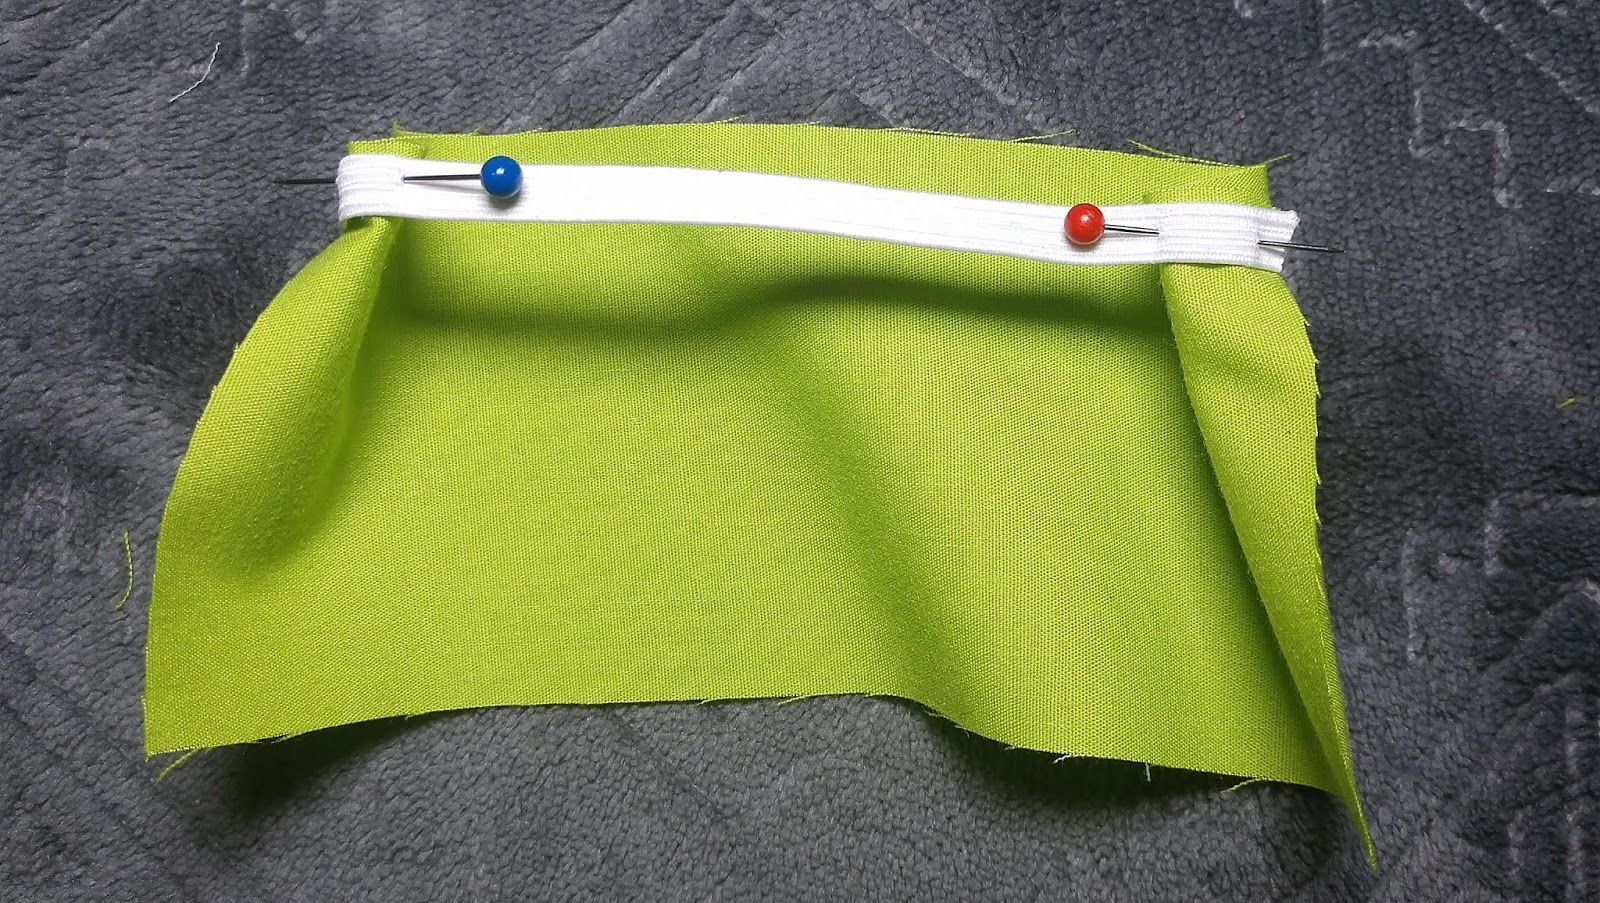
Okay, one more technique before we start talking about machine gathering (say what? Let the machine do all the gathering for me? Yes, yes, but we will get there, let me show you this one first!) Alright, okay, this is a fun way to gather, but it’s probably also the least used because it’s not quite as versatile as some of the others. We are going to use elastic for this one! But not just any elastic, you are going to want ¼ inch elastic, and something thin and very stretchy. A good way to tell if the elastic you have will work, just stretch it. Using the example of gathering an 8 inch piece of fabric to be 4 inches, make sure the 4 inches of elastic will stretch to the full 8 inch length of the fabric. If it does, perfect! If not, find another kind of elastic.
Tip: I heard someone suggest using foe (fold over elastic) for this, but I would hesitate because it’s more wide. Could if be folded in half or used like binding? Sure! But if folded, it may have an edge that wants to flip up. And if used like binding and then surging, the elastic may be cut into and then fall apart. Please note that I have not tried either of these methods! I am just trying to troubleshoot some possibilities I foresee. If you use either of these techniques and love them/hate them, please let me know! I’d love to hear about your experiences!
So, back to using 4 inches of elastic on 8 inches of fabric to create a 4 inch ruffled piece. First thing I want to say is cut the elastic an inch longer! Having the extra inch gives something to pull on from behind the machine, making it a lot easier to start stitching! Mark your elastic at 1 inch and pin it to the wrong side of the fabric. Then pin the other raw edge of the elastic to the edge of the wrong side of the fabric. In this case, stretching the elastic evenly is going to be simple because it’s so short! But if the ruffle is going to be a long one, it might be helpful to mark the elastic and fabric at matching points along the way. The center and at quarter points (just like a waistband or neckband) is perfect! If you want to mark more than quarter points, feel free to be as precise as desired!
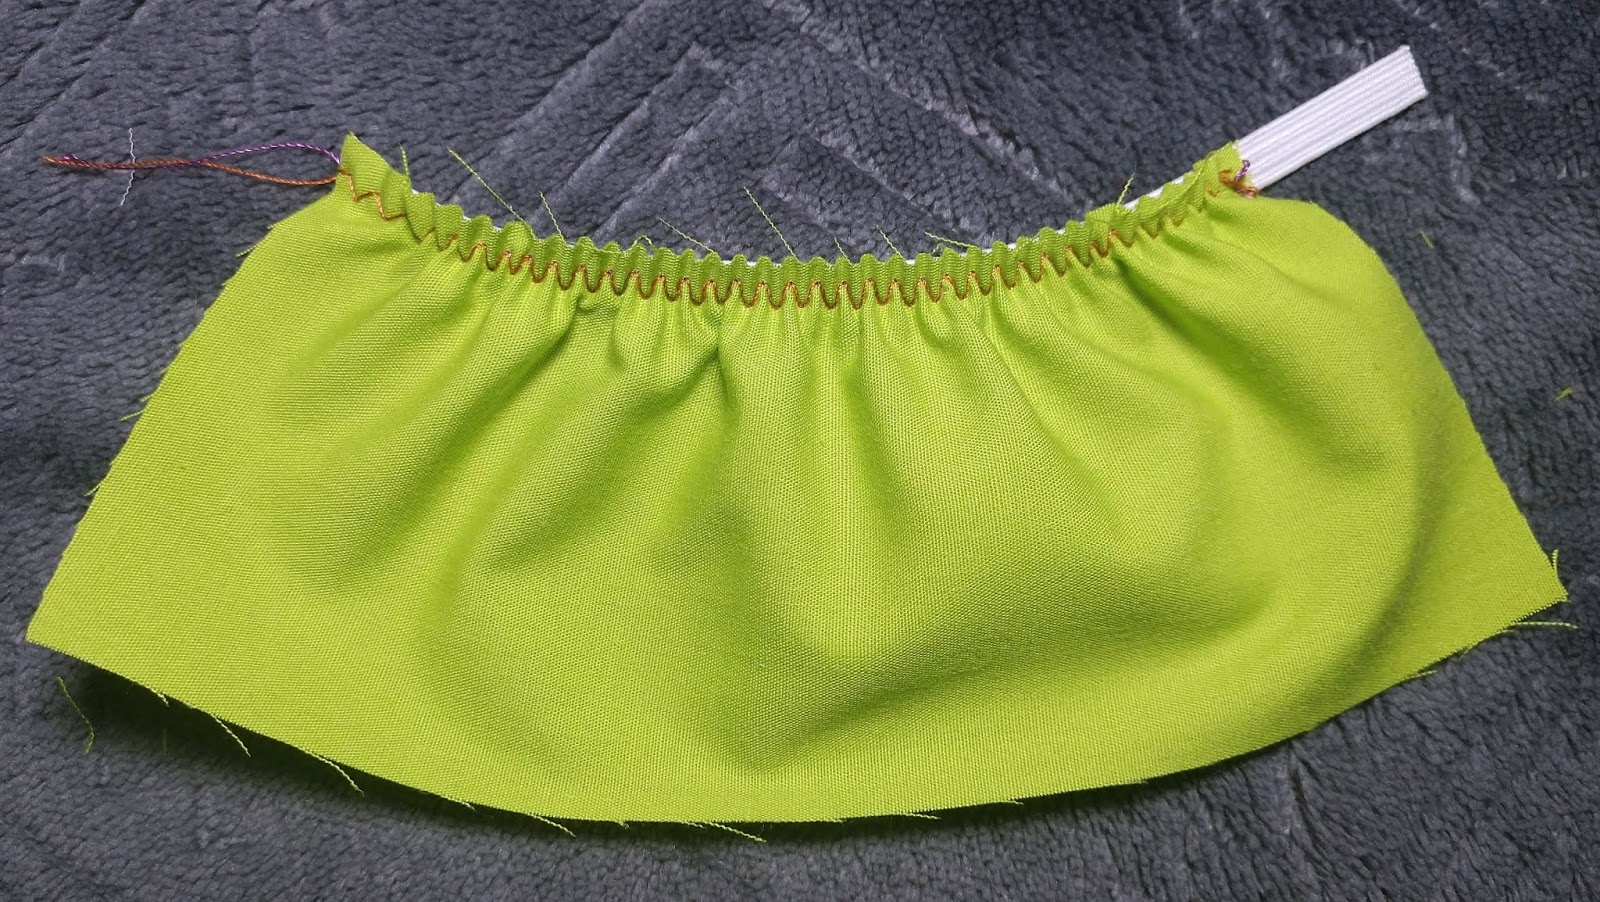
Using a stretch stitch, a zigzag is good, put the fabric and elastic under the presser foot and use the one inch extra tail to hold the elastic, give the fabric 2 or 3 stitches before beginning to gently pull the elastic taut from front and back, or from pin to pin making sure the elastic stays lined up with the raw edge of the fabric. Follow this process all the way down to the last of the elastic. When its completed the fabric should bounce back to the 4 inches of the elastic. Please note: because you have stitched into the elastic it is not going necessarily going to hold its shape tightly and it may end more than 4 inches long. The elastic will return to its “natural” shape eventually, it should be possible to “make it work” in the project because the elastic should regain its elasticity after a while and if not, the last ¼ inch of the ruffle usually looks pretty rough and will need to be trimmed anyway.
This is a similar way that ruching is added to some clothing. Usually the side ruching in maternity shirts is added this way or the cute rushing down the front of swimsuits and anytime there needs to be ruching (just a fancy term for gathering) where there isn’t a seam. The reason why elastic is used in these applications is that one, there isn’t a seam to gather at, and two, elastic can add extra bulk to a seam that is unnecessary and possibly unflattering. So keep that in mind when using elastic to gather. It might be quick and easy with great looking results every time, but it won’t always give the desired results because of bulk and weight.
Now, to the part I know everyone has been waiting for! How to make the machines do all the gathering?
Machine Gathering
Friends, this is not nearly as easy as it seems! I’m sorry!! I don’t make the rules! And even if I did, most sewing rules were meant to be broken and I’m sure I’d be right there with you trying to help figure out how to work around, over, under or through those rules! But really, using a machine to do all the gathering isn’t going to make things easier, but it is an adventure! The main thing to know when using a machine to do the work is that the machine doesn’t know or understand how long the ruffle needs to be, so the finished result may be longer or shorter than needed. So, basically, what I’m saying is that if there isn’t a specific length needed, or if you can figure out the math to get the length needed (and I don’t know that math, I’m sorry!) then machine sewing is going to be perfect! But for all other reasons, you might want to try some of the other techniques above instead.
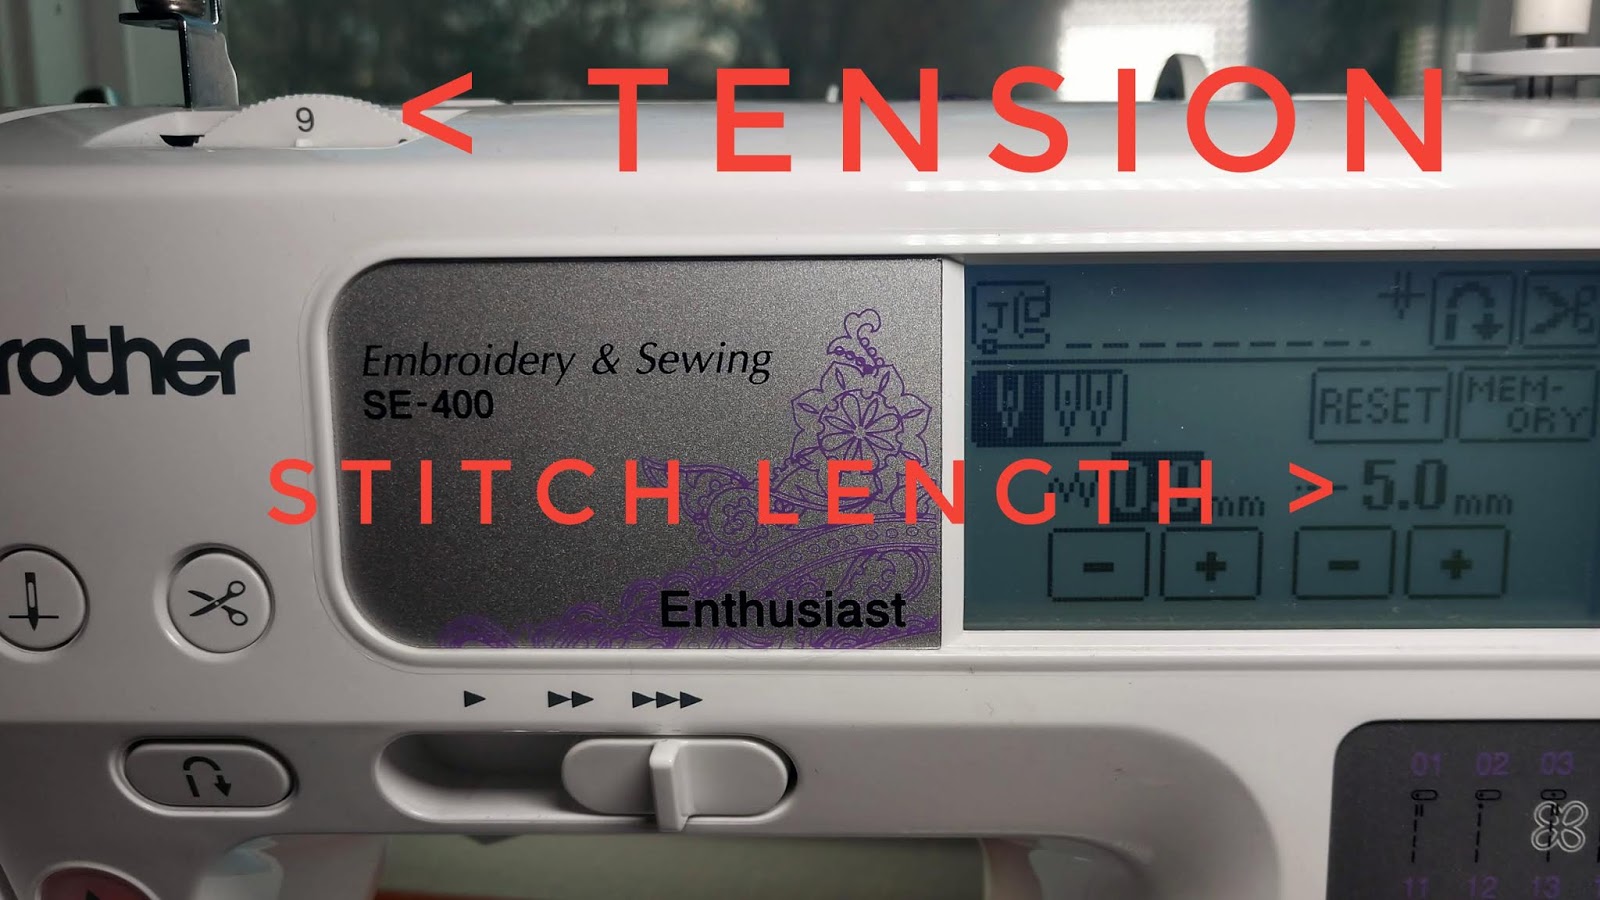
Enough of the reasons why not, let’s just get started with the why! First, start with the sewing machine. Set the length of the stitch to the longest setting. On my machine that’s 5 mm, just like a basting stitch. If your machine has a basting stitch setting just use that. Adjusting the tension is how the ruffle comes about. The higher the tension the tighter the ruffles. I set my machine to have a tension setting of 9 for the first third of the ruffle, 6 for the second third and 3 for the final third. I should mention that the tension on my machine is usually set at a 3.
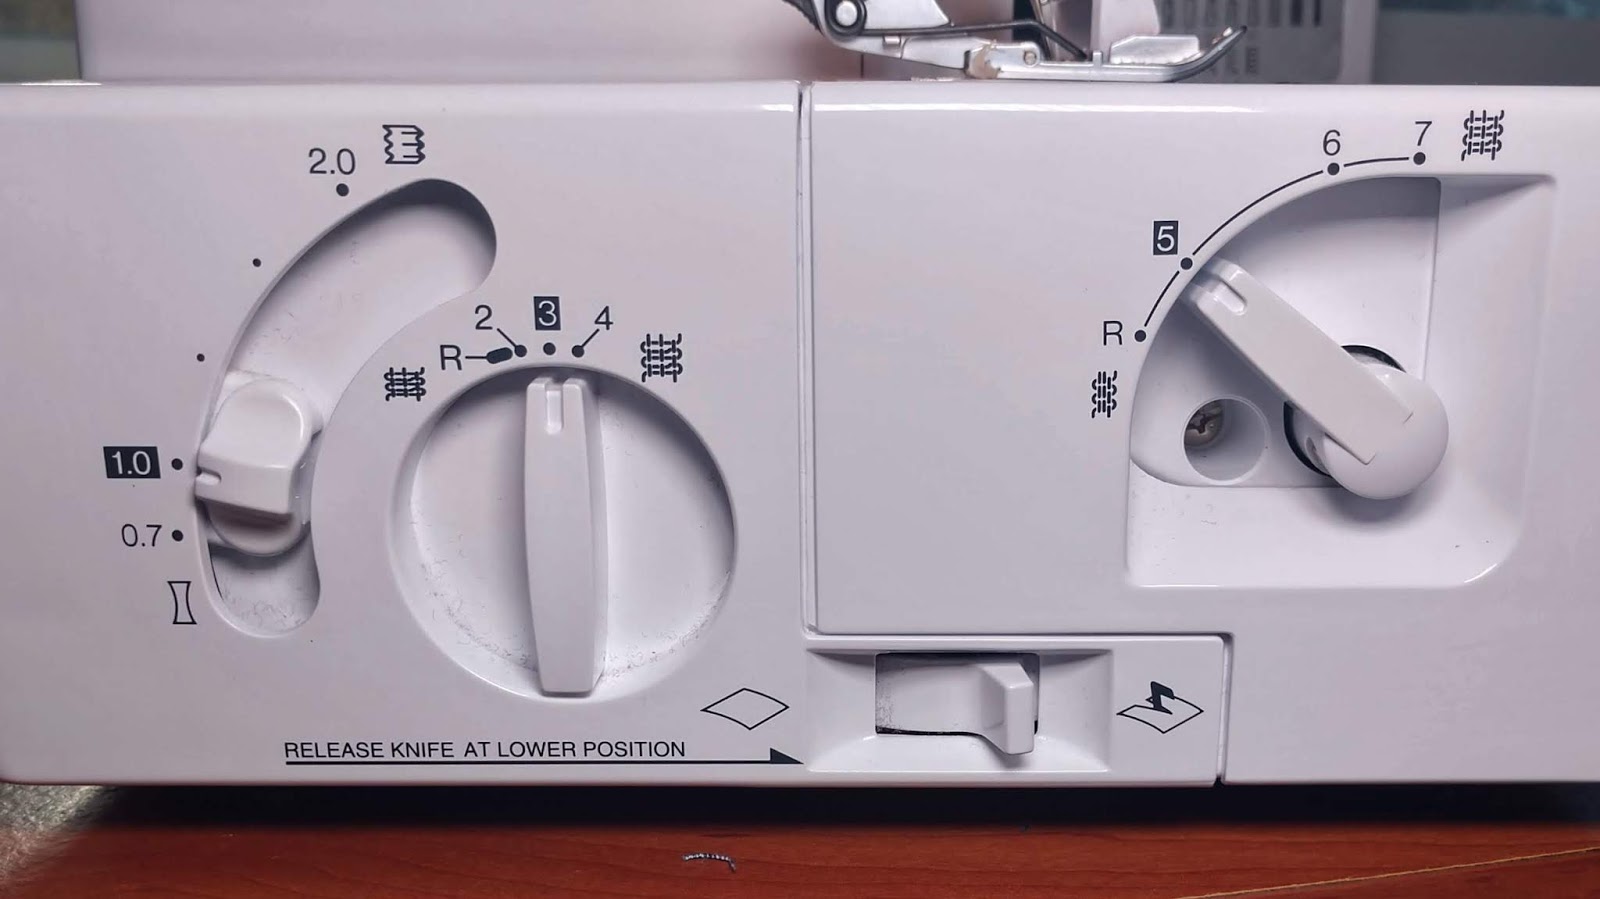
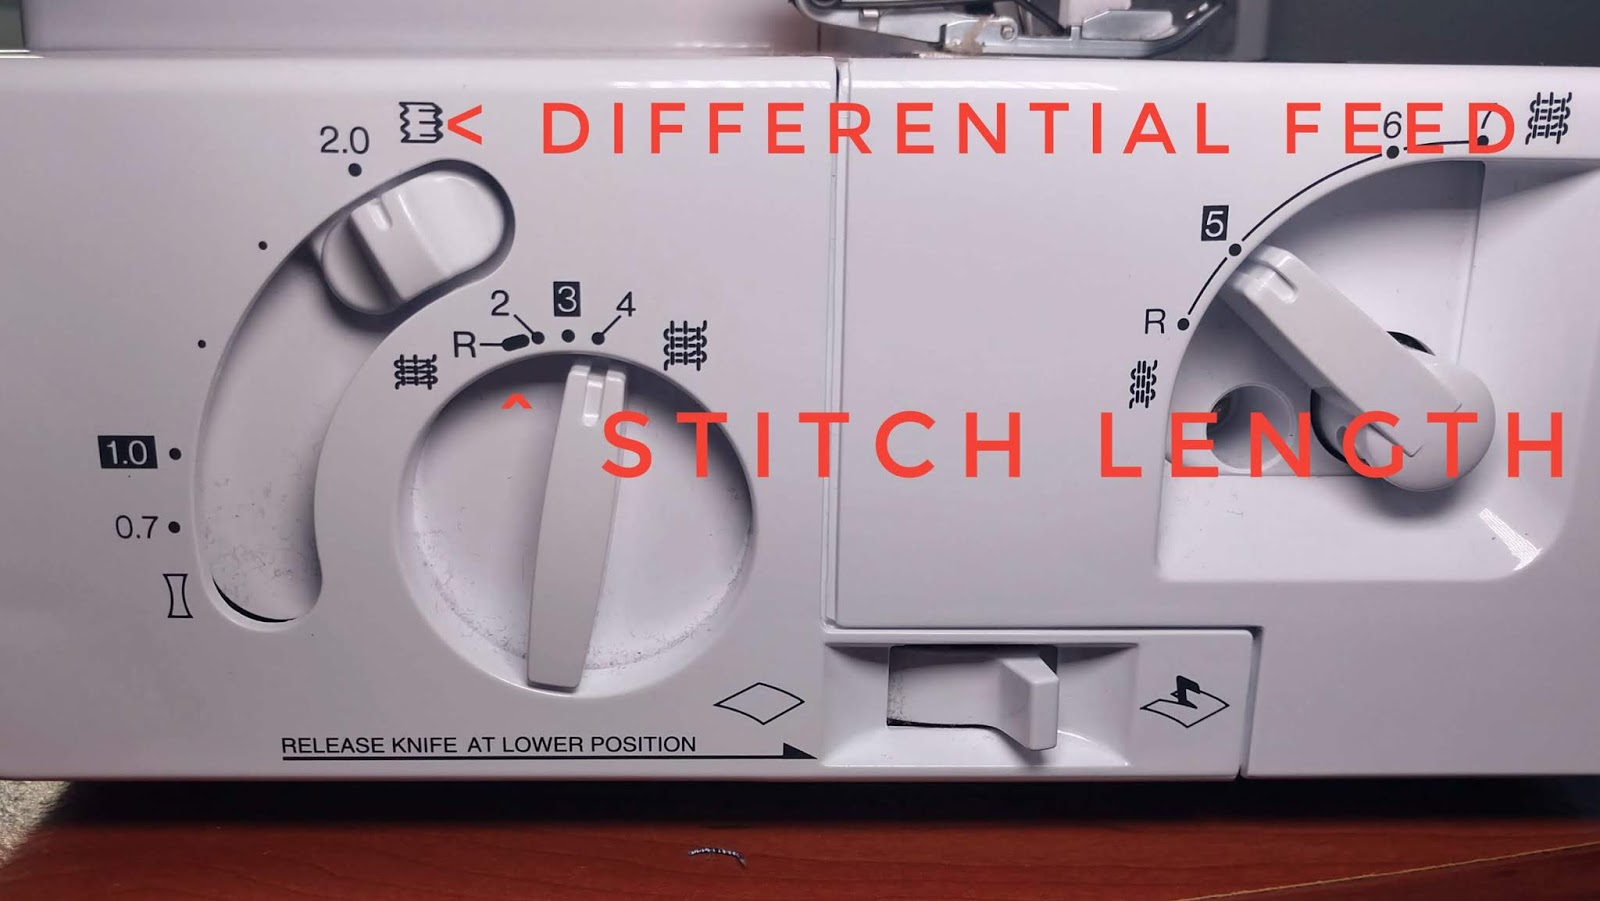
Next, have you heard the rumor of being able to ruffle with the serger? Terrified of changing the setting on said serger in order to try it out? I hear ya! I totally understand where that fear comes from. But I’m also here to say that it’s not nearly as bad as all that! We aren’t even going to touch the tension!! I know how hard it is to get those back to perfect, believe me I know!! I have a Brother 1034D. I am going to turn my machine to the side and where there dials. These dials are going to give us the ability to ruffle fabric. These are my current settings.
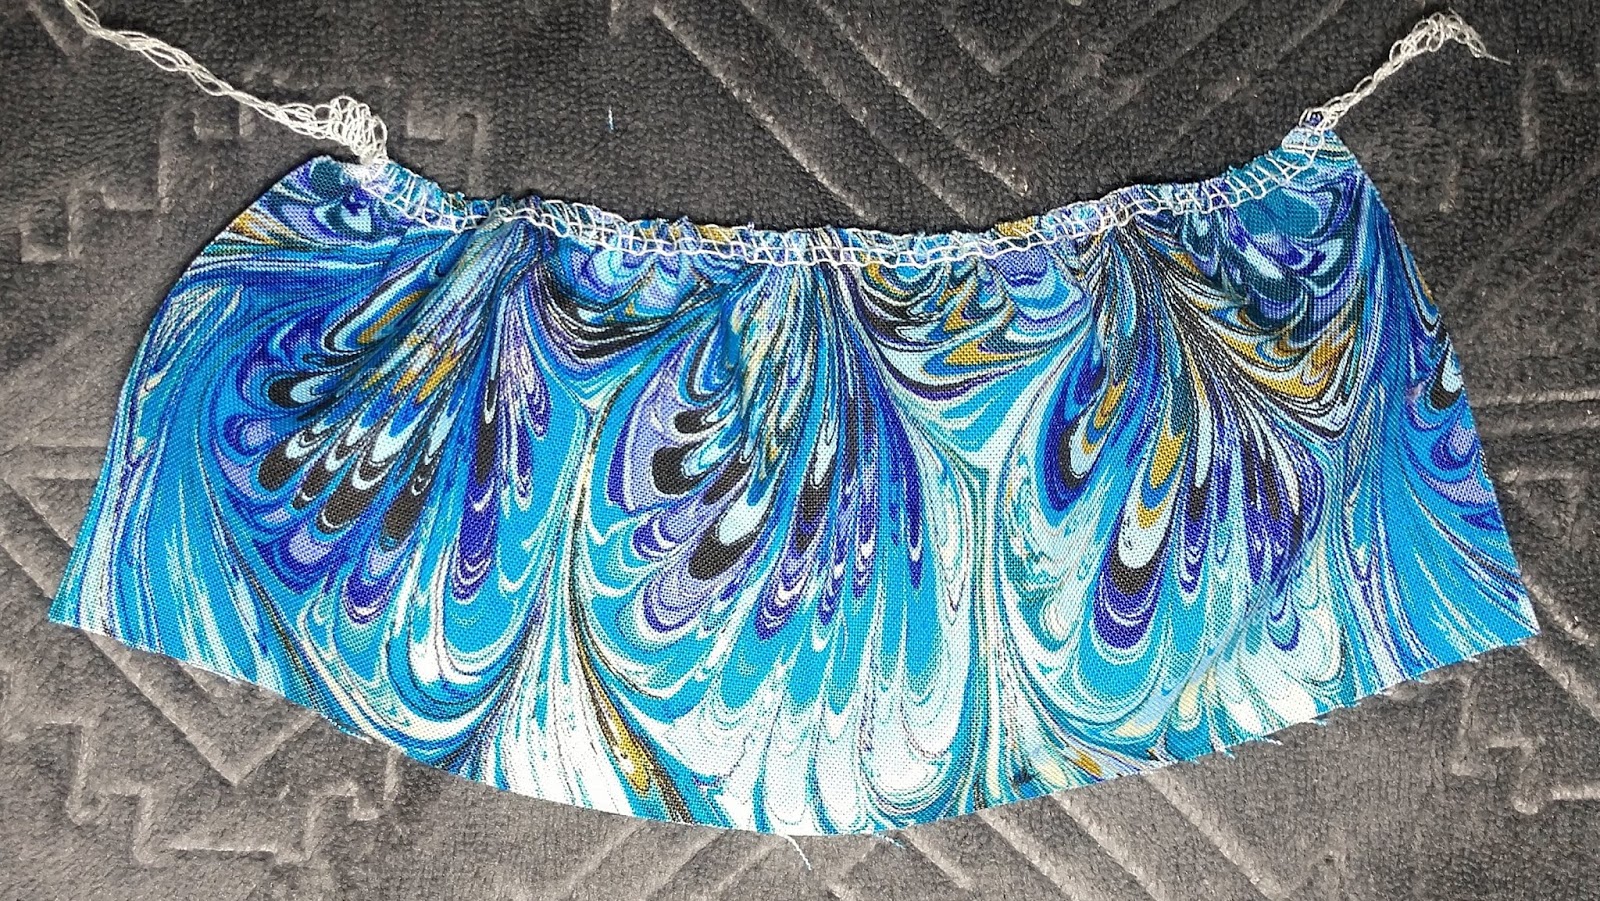
We are going to make two changes, just two. This first switch is the differential feed. That is how quickly the fabric is pulled through the machine and by which presser feet, front and back. By increasing this number, from 1 up to 2 the fabric will basically pucker up under the presser foot. What happens is that front feed dogs, the ones that pull the fabric into the machine, are moving faster than the rear feed dogs, the ones that pull the fabric out of the machine, so the fabric gathers where it’s being sewn. The stitch length also needs to change. The first dial, the one right after the differential feed switch, is the stitch length. Normally that is set at a 3, switch it up to 4, that’s the highest mine goes. I didn’t change anything else. I didn’t change my tension or disengage my knife or anything. Sending a piece of fabric through, this is the result. It’s not a very tight gather and not very precise. But it’s a nice pretty, soft gather.
Now, before we wrap up this EPIC compilation of fabric gathering I want to mention one last way to gather. Unfortunately I can’t show pictures this time, which makes me sad, but there was nothing I could do. And I am so sorry! I wanted to show you, but sometimes life it just funny that way. Backstory: Last summer I sold my first sewing machine. It was a beautiful Singer that had all these great fun stitches built in and came with almost every kind of presser foot you could ever want or need! My husband spoiled me with a better machine, the cute Brother SE-400 that’s been in the pictures. I had both for several years but hadn’t pulled out the Singer in over 2 years so I decided it was time to let the Singer go to someone who would use it. So I sold it and all of its feet. One of those feet was a gathering foot. It was this interesting little square foot that had to be installed with the screwdriver. It was squarish with a insert hole on the top and a slice through the middle where another layer of fabric could be added.
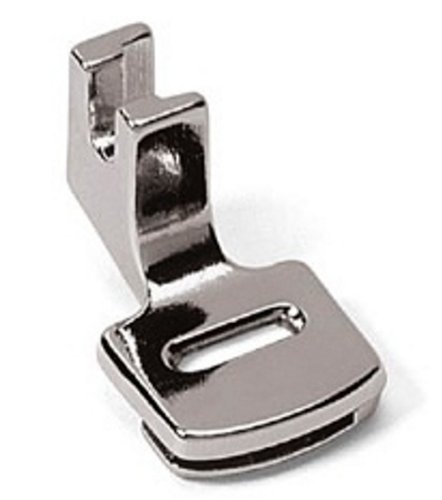 |
| Image borrowed from Amazon.com |
This little foot is pretty fascinating because it uses its shape to gather fabric and can even attach and gather at the same time! The amount of gathering, as determined previously, is adjusted by the tension. The fabric being gathered should be placed right side up and slid completely underneath the gathering foot, the fabric that will not be gathered should be placed right side down in the slot and the sewing machine will gather the bottom fabric and stitch it to the top fabric all in one move! How awesome is that?!? This is seriously cool!
There is also a big mechanical ruffler foot that I have heard of, but I have never even seen except in pictures online. So if you have one, I’d love to know how it works! It is adjustable, can you determine the look of the gathers as well as you can with a triple row gather? Is it as quick as the floss method? Or as fun as hand stitching? Can hand stitching be considered fun?
My friends, there are so many ways to gather and so may looks and outcomes! There are so many ways to make fabric gathering easy, or quick, or precise, or fun. There are so many ways to make the gathering yours. Please don’t be afraid of it! Just know how much dimension and fun can be added to any project with a little ruffle, and I can’t wait to see them all! Now go out and ruffle all the things!


Amazing!!!! I’ve attempted a few of these, and will definitely be trying embroidery thread and the three base stitch method. Great research. Thank you for your time.