
Hey everyone its Daryl and I'm here to share with you my love of applique.

When my Poké-obsessed kiddo saw a picture of this cute “pika-T”, I said, no problem, Mama can make that! Appliqué is one of my favorite techniques for adding a special touch to my sewing.
There are many different ways to appliqué, but I’m going to show the method I turn to most often. It uses an iron-on adhesive, so it’s is best for fabrics that can take a lot of heat and steam, like cotton Lycra jersey or French terry. I have used it with polyester fleece—I just kept the iron on the synthetic setting and checked often to make sure it wasn’t melting. But if you don’t like to live on the wild side with me, stick to natural fibers for this technique.
Doing applique this way is also a great technique to use when you find a fabric print that is perfect for adding something special to your project. In this post I will also show how I used this technique on some amazing water color dino’s from Eunoia Fabrics.
*Daryl is a home sewist, not a business, and the Pika-T was made for personal use only; not resale. The purpose of this article is to show the home sewist how the applique technique can be used to add unique items to their sewing projects, even fun ways to resemble your child’s favorite characters on items that don’t exist in the retail market.
Here are the basic steps I use:
1. Cut the garment pieces following the sewing pattern
2. Trace my design MIRRORED onto the paper side of Heat n Bond lite.
3. Rough cut the Heat n Bond and fuse to the WRONG side of appliqué fabrics.
4. Carefully cut out the appliqué pieces on the lines.
5. Fuse appliqué pieces to the garment piece.
6. Top stitch the appliqué.
7. Sew up the garment.
Let me go through each step with a few tips and tricks I’ve learned along the way.

Step 1: Cut the garment pieces following the sewing pattern.

I like to cut all the garment pieces before I start working on the applique for 2 reasons. 1) It helps me plan my appliqué by laying out the pieces in the shape of the finished garment, so I can visual the size and placement of the appliqué and how the colors all work together. I often lay scraps of the appliqué fabrics on top of the garment pieces to try out different ideas. And 2)once I’ve done all the top stitching for the appliqué (not gonna lie, it can get a little tedious), it’s so satisfying to have everything ready to whip through the serger for a quick finish.
Heat-n-Bond Lite is the fusible adhesive I generally use. Be sure to get the “lite” version which can be sewn (the heavier one will gum up your needles, ask me how I know). Heat-n-Bond is a double-sided adhesive: one side has the adhesive exposed (shiny with a rubbery feel) and the other side has paper covering the adhesive. Draw your design on the paper side. Although I use washable marker to mark fabric, on the Heat-n-Bond, I use a regular ink pen so it won’t run or disappear when ironing.
The projector I use for tracing sewing patterns also makes appliqué so easy! (If you’re not familiar with using a projector yet, I highly recommend the Projectors for Sewing group on Facebook for tons of useful guidance and help getting started).
Step 2: Trace my design, mirrored, onto the paper side of Heat-n-Bond lite.
In the pics, you can see I projected a picture of the appliqué design right onto the shirt front (Pic 1). I adjusted the size of
the image until my 6 year old told me it was perfect. Then I traced the main outlines of the shapes onto the shirt front with washable marker (I use Crayola Ultra Clean markers), so the placement would be easy later (Pic 2). Finally, I traced
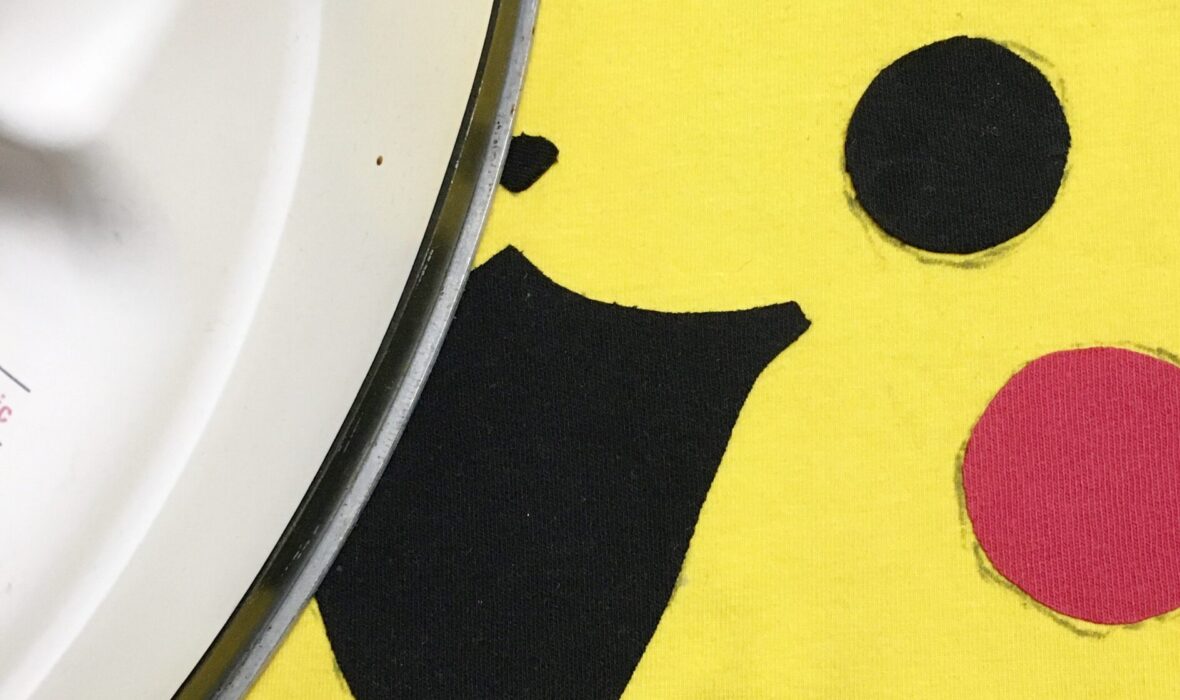
every single shape in the appliqué on to the paper side of the Heat-n-Bond (Pic 3). For example, each eye in this design has 2 shapes: a bigger circle (black) and a little circle (white). If your design isn’t symmetrical (and especially if it includes writing!), remember to MIRROR when you trace. Your final appliqué will be the reverse of what you are tracing now.


Step 3: Rough cut the Heat n Bond and fuse to the wrong side of appliqué fabrics.
I find that I get a cleaner cut on my appliqué pieces if I fuse first and then cut through the paper. So to initially separate the pieces of Heat n Bond, I do a quick rough cut leaving a little margin around all of the edges. Tip: If your design has pieces that look similar (like the circles for the eyes and cheeks), label them before cutting apart. Then fuse to the WRONG side of the
appliqué fabrics following the fusible directions. (I use a hot dry iron and iron for a few seconds, just enough to adhere.)

Step 4: Carefully cut out the appliqué pieces on the lines.
I use my sharpest non-fabric scissors to cut through the paper right on the lines for a good clean cut. For more complicated shapes like these beautiful dinos, I find it helps to hold the scissors steady and rotate the fabric instead with my other hand.


Step 5: Fuse appliqué pieces to the garment piece.
If I haven’t already finalized the appliqué placement, I again like to layout the cut garment pieces to help me decide exactly where to place it (Pic 1). Also, it’s just satisfying to see how everything is coming together. Next, I iron the appliqué pieces directly on to the fabric to “baste” them in place (Pic 2). I use a hot dry iron just long enough so they start to adhere. This makes sure that nothing shifts out of place when I add the wet cloth for steam to permanently adhere them.


Pic 1 below shows how the paper backing peels right off (you can see the shiny adhesive underneath). For this design, I iron-basted the bottom layer pieces (Pic 2) and then iron-basted the top layer pieces (the white sparkles for the eyes and the pink tongue). Then (Pic 3) I laid a damp cloth over the top and ironed through the cloth (to produce a lot of steam) with pressure for at least 10 seconds over each section of the appliqué. Lift up the iron and move to each new spot (don’t slide it).


After fusing, I remove the damp cloth and iron directly over the appliqué again, to smooth out any little bubbles, make sure every part is well-adhered, and dry out the fabric before sewing. I turn the piece over and iron from the back as well.
Note: the Heat n Bond can feel a little stiff when you first fuse it, but in my experience, it will soften up in the wash. For example, I once made a dress with a large 2 layer appliqué over most of the front. When I finished, I thought I had made a huge mistake as it was so stiff. Happily, after a couple of washes, the appliqué felt soft, and the dress draped nicely again.
Step 6: Top stitch the appliqué.
For some designs, certain appliqué pieces need to be sewn before fusing an overlapping piece. But in most cases, I can fuse it all and then sew. If you’re using knit fabrics which won’t fray, you can choose any stitch for top stitching. For example, I did a simple straight stitch around these appliqués because it’s quick and easy. You can also use a straight stitch with woven appliqués if you like the edges to get that frayed rustic look. If you want to enclose the raw edges of a woven appliqué or you just like the style, you can use a satin stitch (a wide zigzag with a very narrow stitch length—your machine may have a
setting specifically for satin stitch).


Leave a Comment